To connect Stripe app please follow the steps listed below:
1.Login to your Bodygraph.com account on one tab. And on the other open and login to your Stripe dashboard.
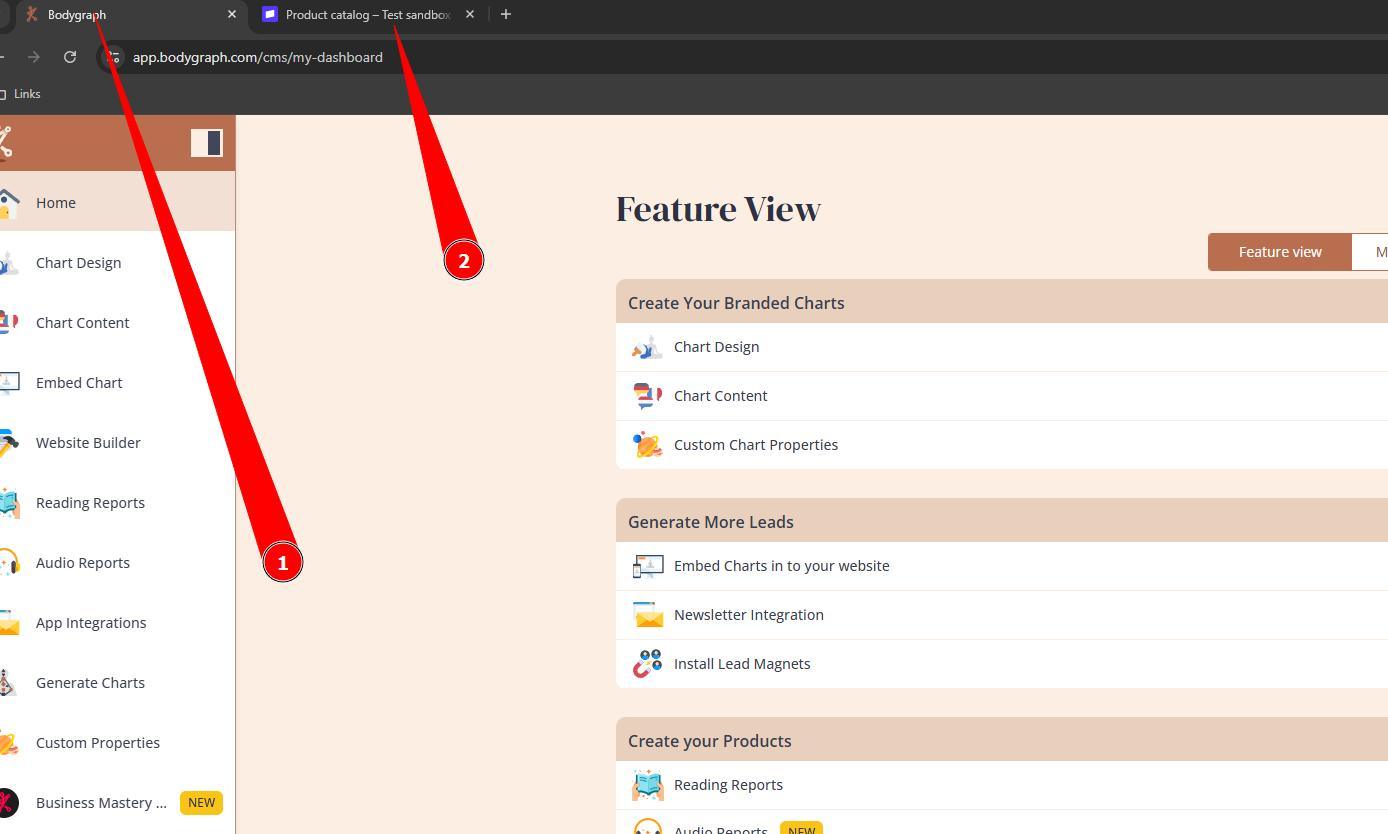
2.At Bodygraph dashboard navigate to App Integrations and click Create new button.
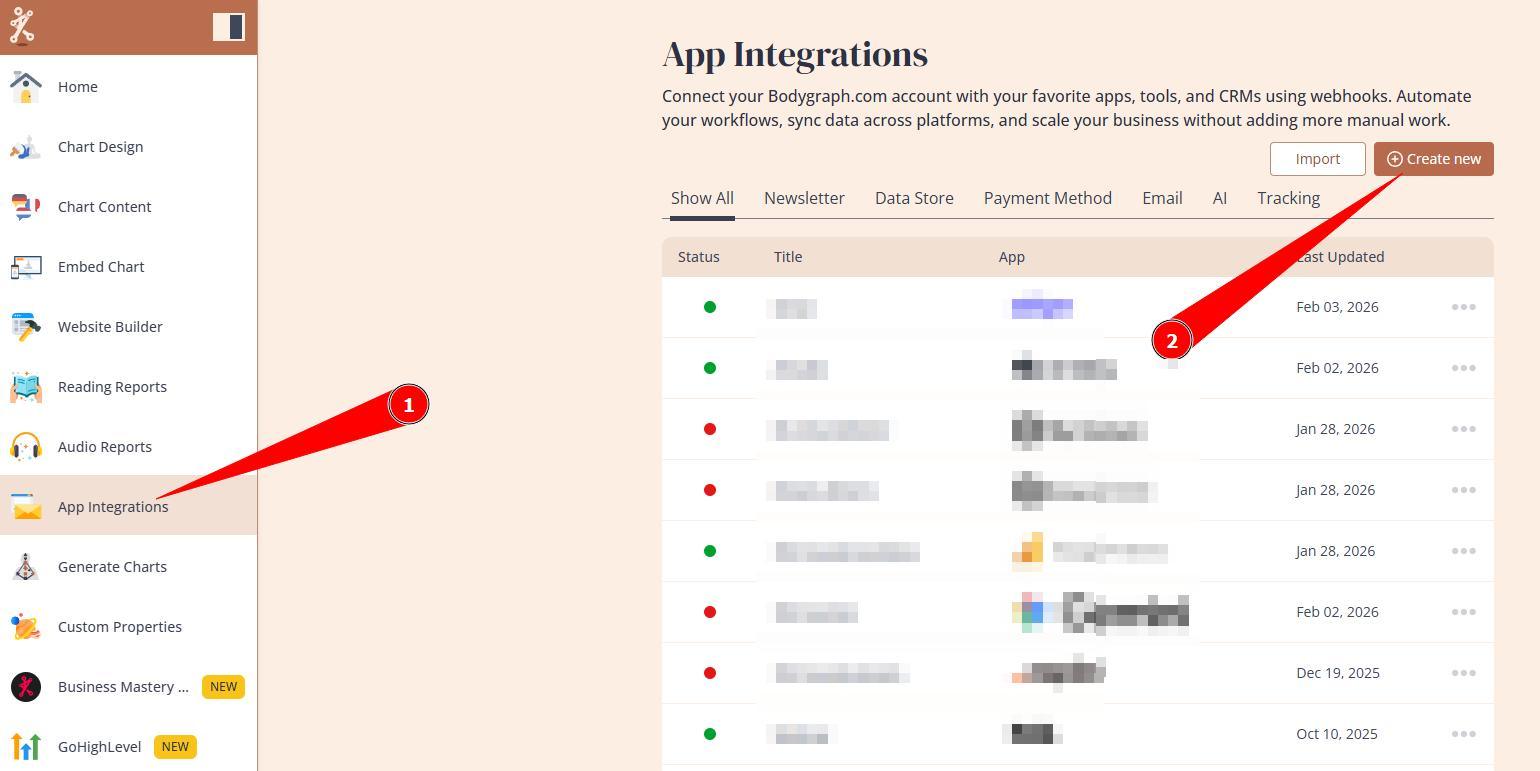
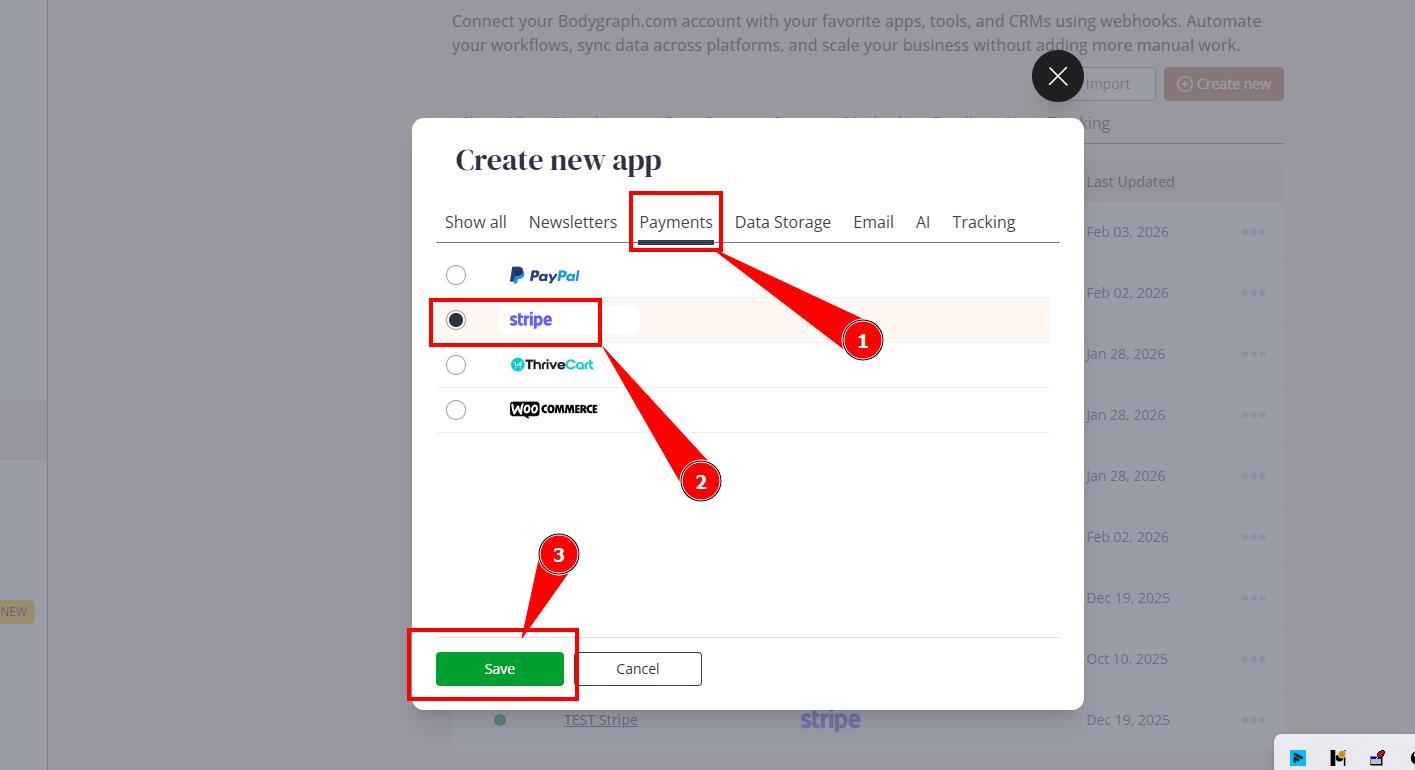
3.Select Payment Apps tab, toggle on Stripe and click Save.
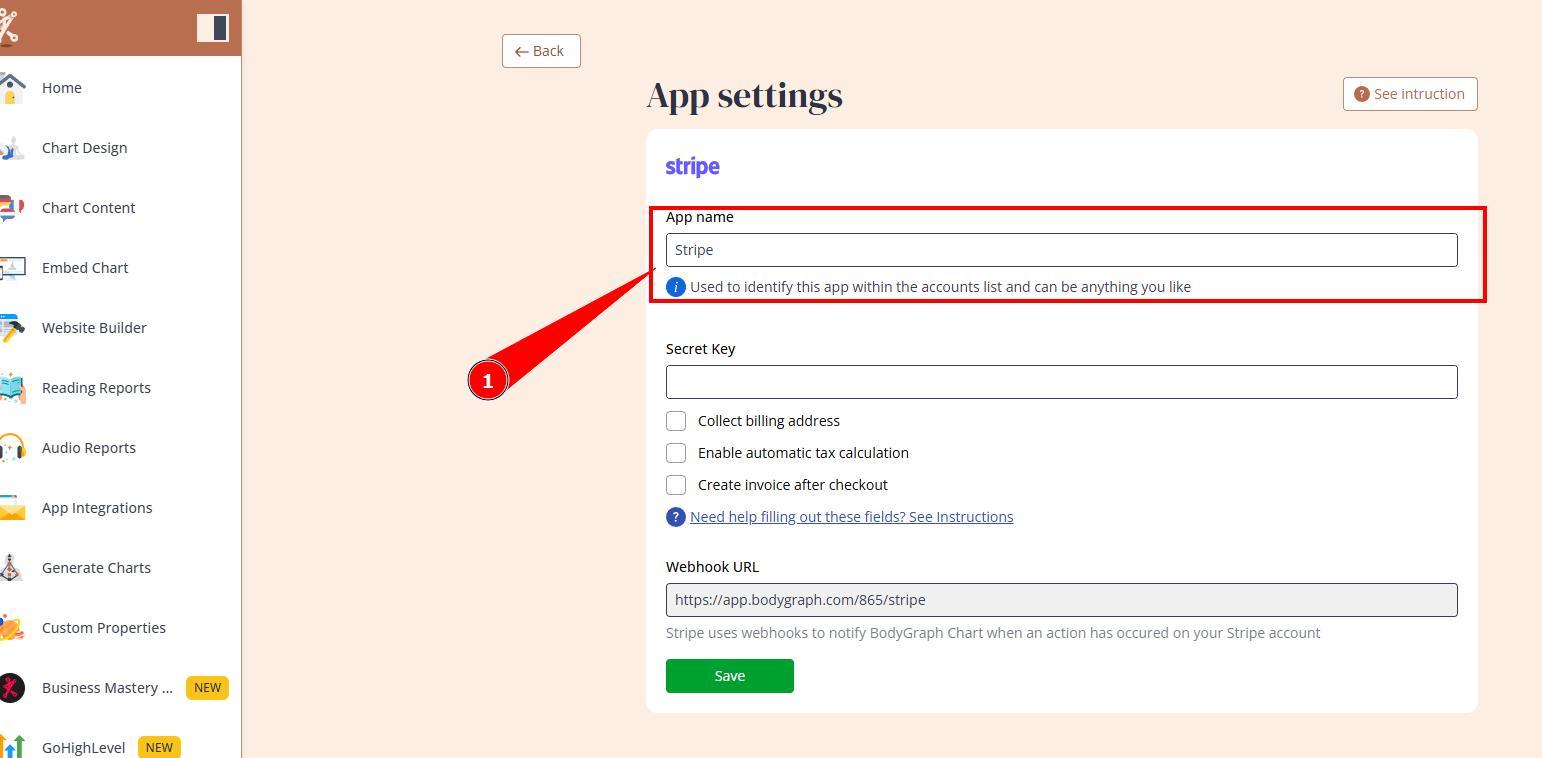
4. Enter the name that will help you identify the payment method and leave this tab open.
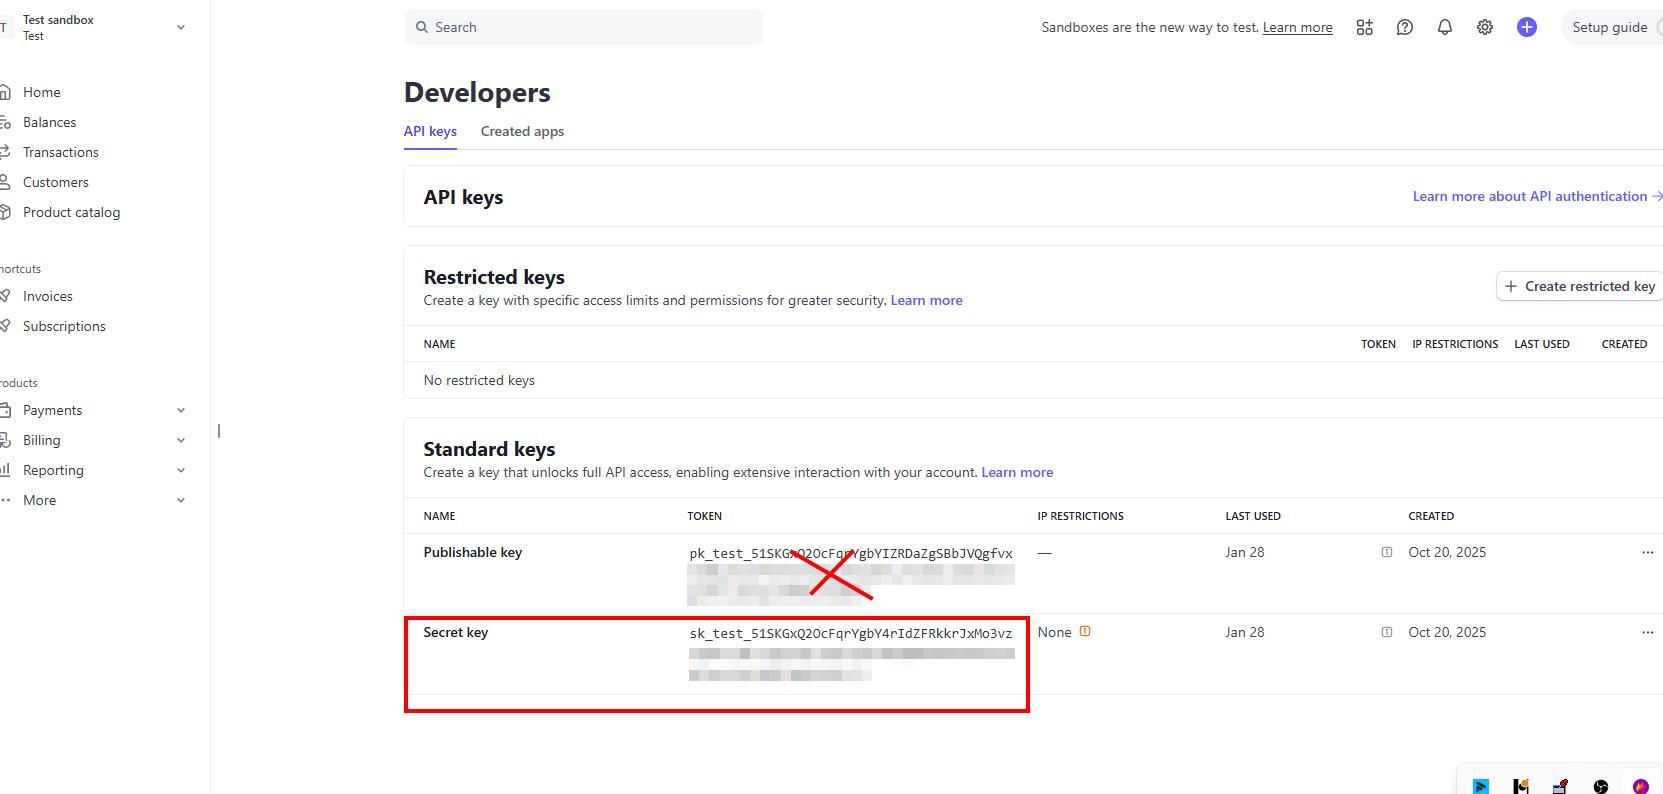
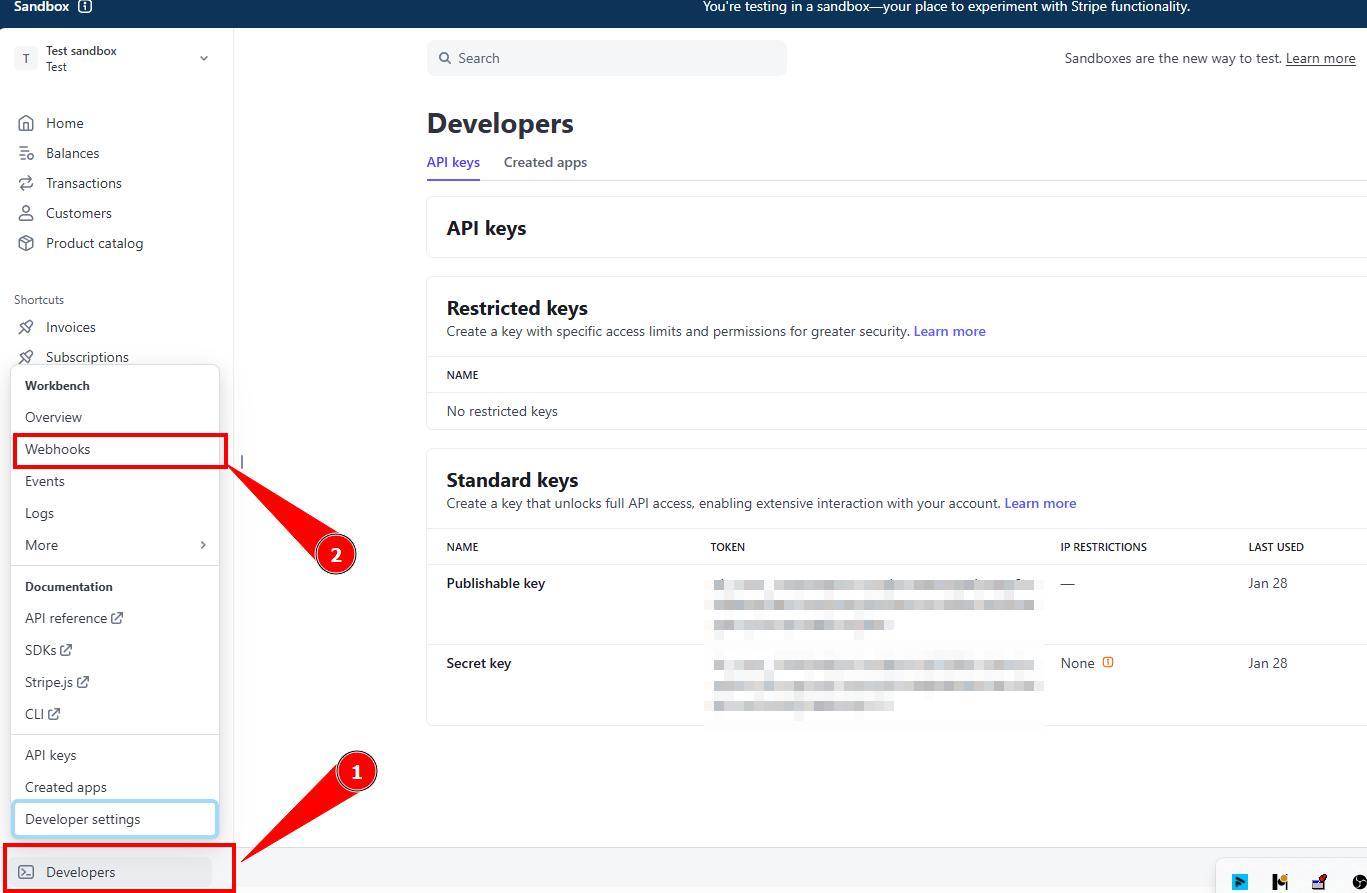
5. Navigate to the Stripe tab, click Developers menu at the bottom left corner and select API Keys option.
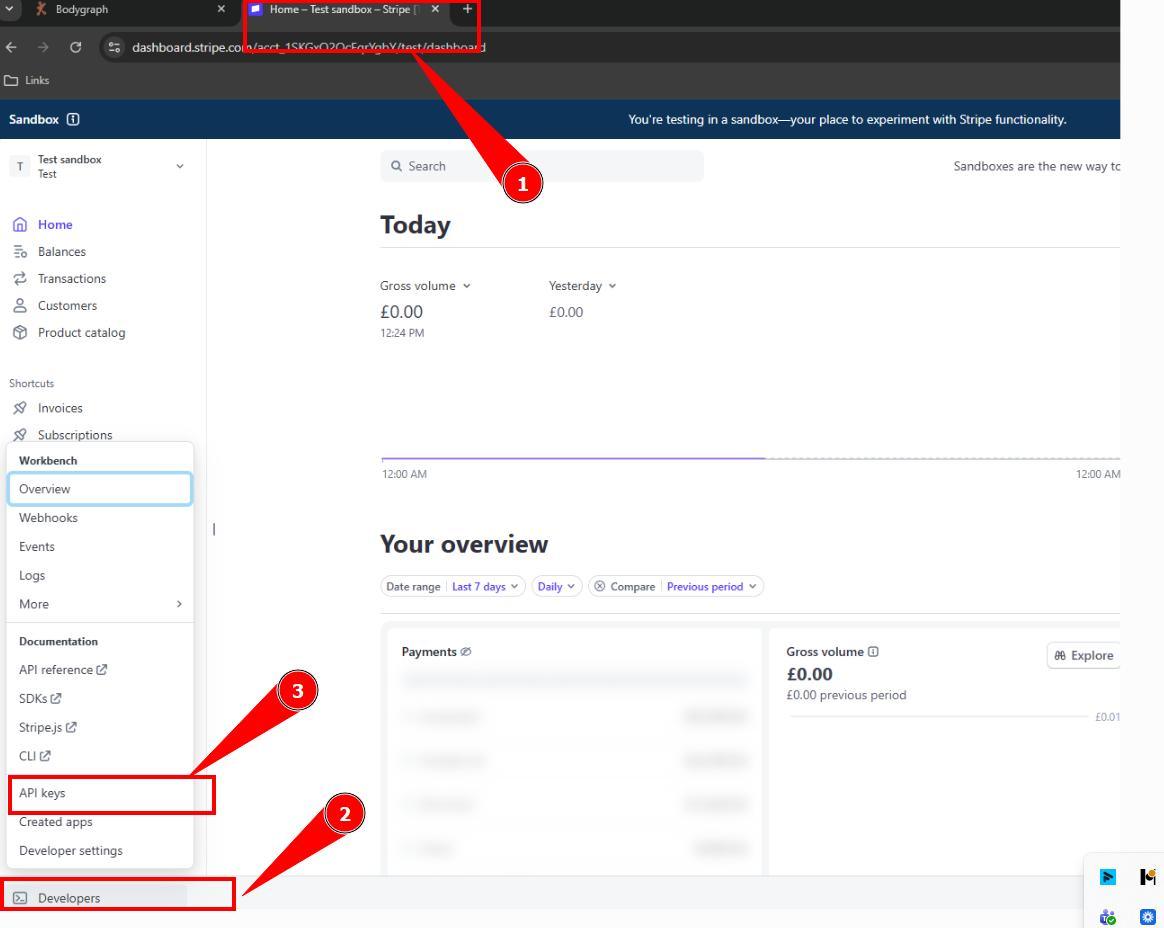
6. Now you will need to copy Secret key. If your Stripe is in live mode you might require to reveal key first and then copy it. Please ensure that you copy Secret key, other keys will not work.
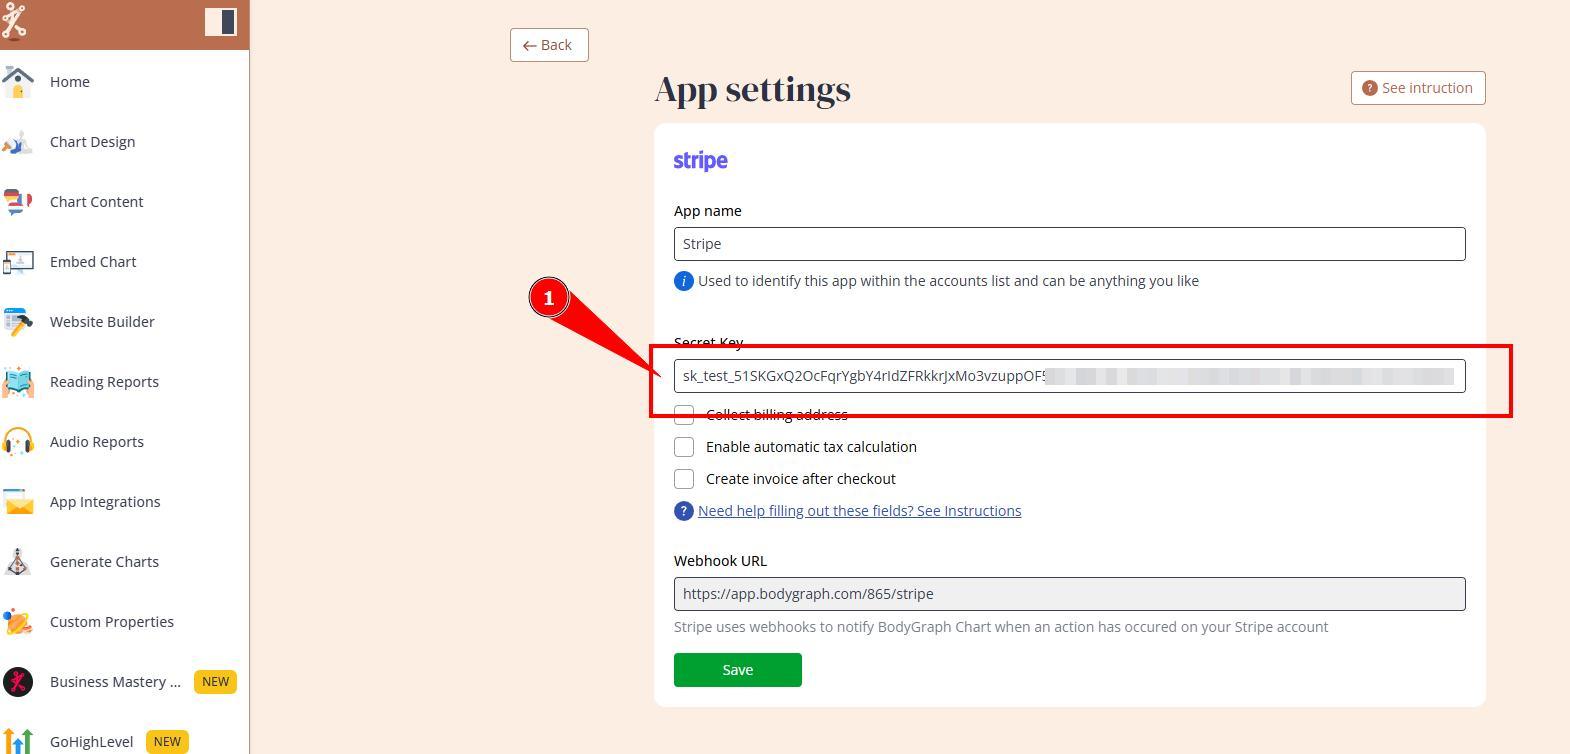
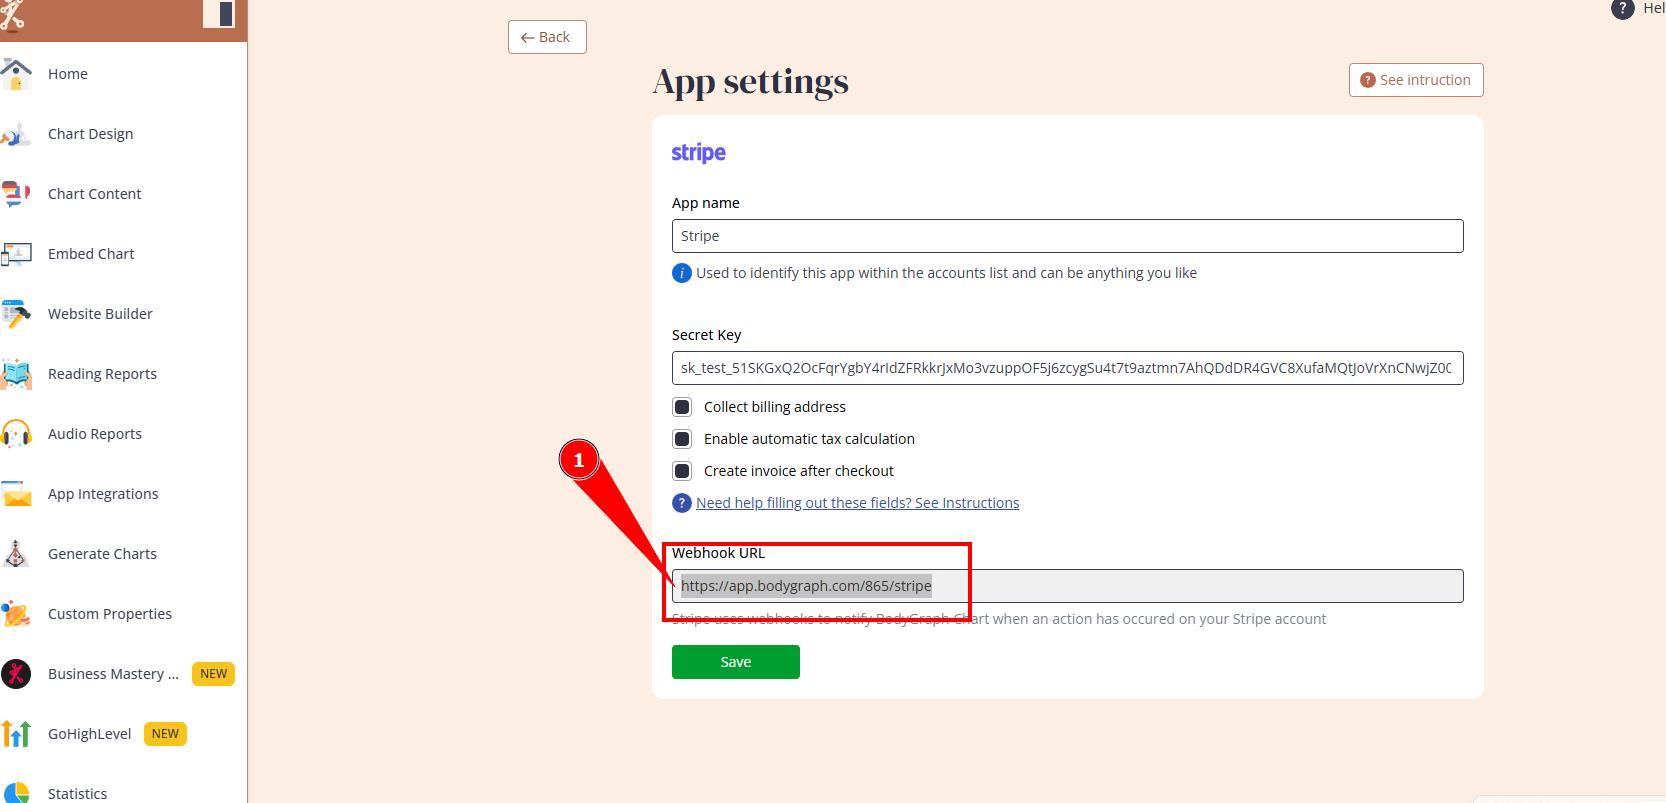
7. Paste secret key into Bodygraph’s Stripe setup.
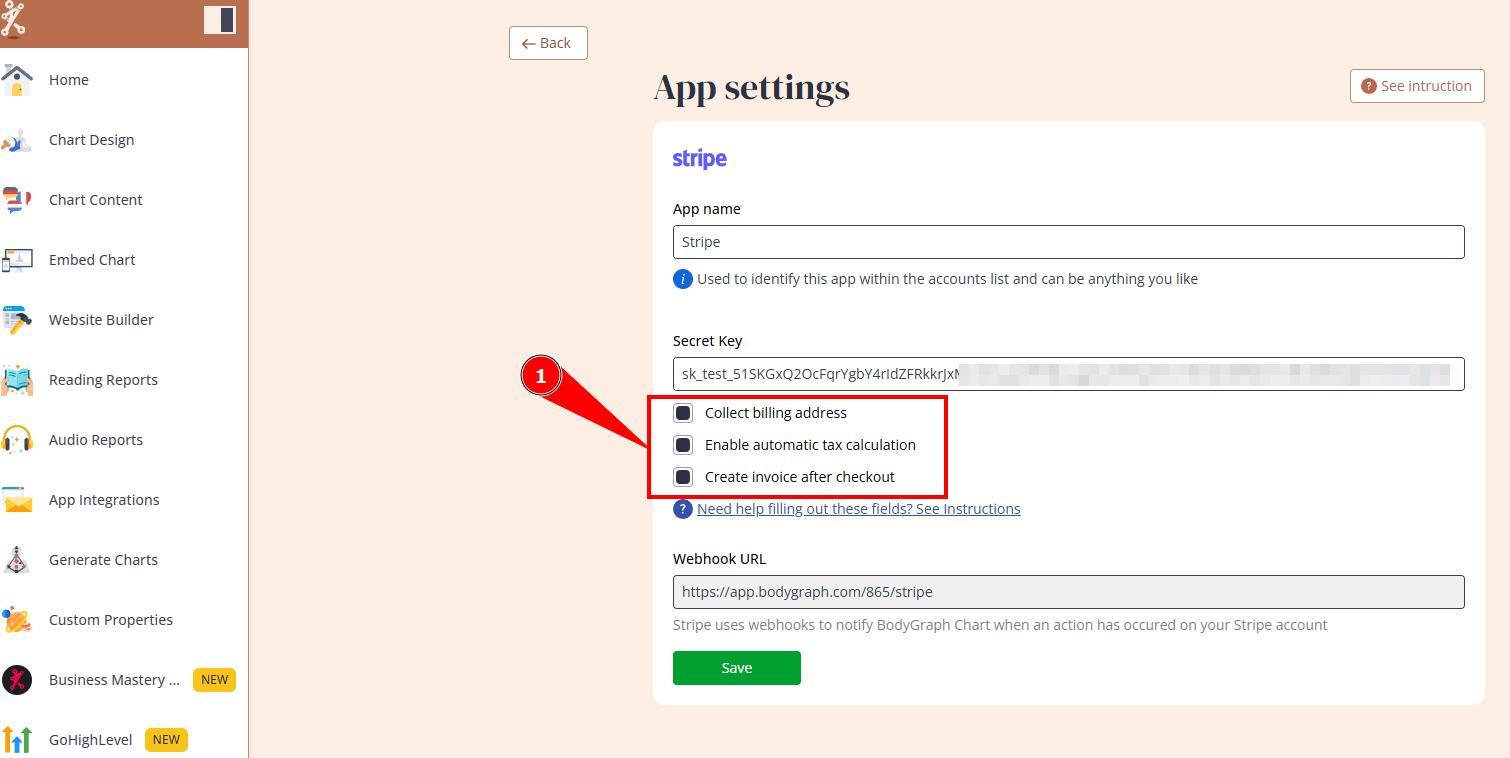
8. Select optional requirements to collect enable billing address capture, tax collection and invoice trigger.
IMPORTANT: Only enable tax calculation if it is configured on the Stripe side too as instructed at their guides. Otherwise the purchase button will show errors. That applies to Invoice setup as they will be send only if this feature is enabled at Stripe.
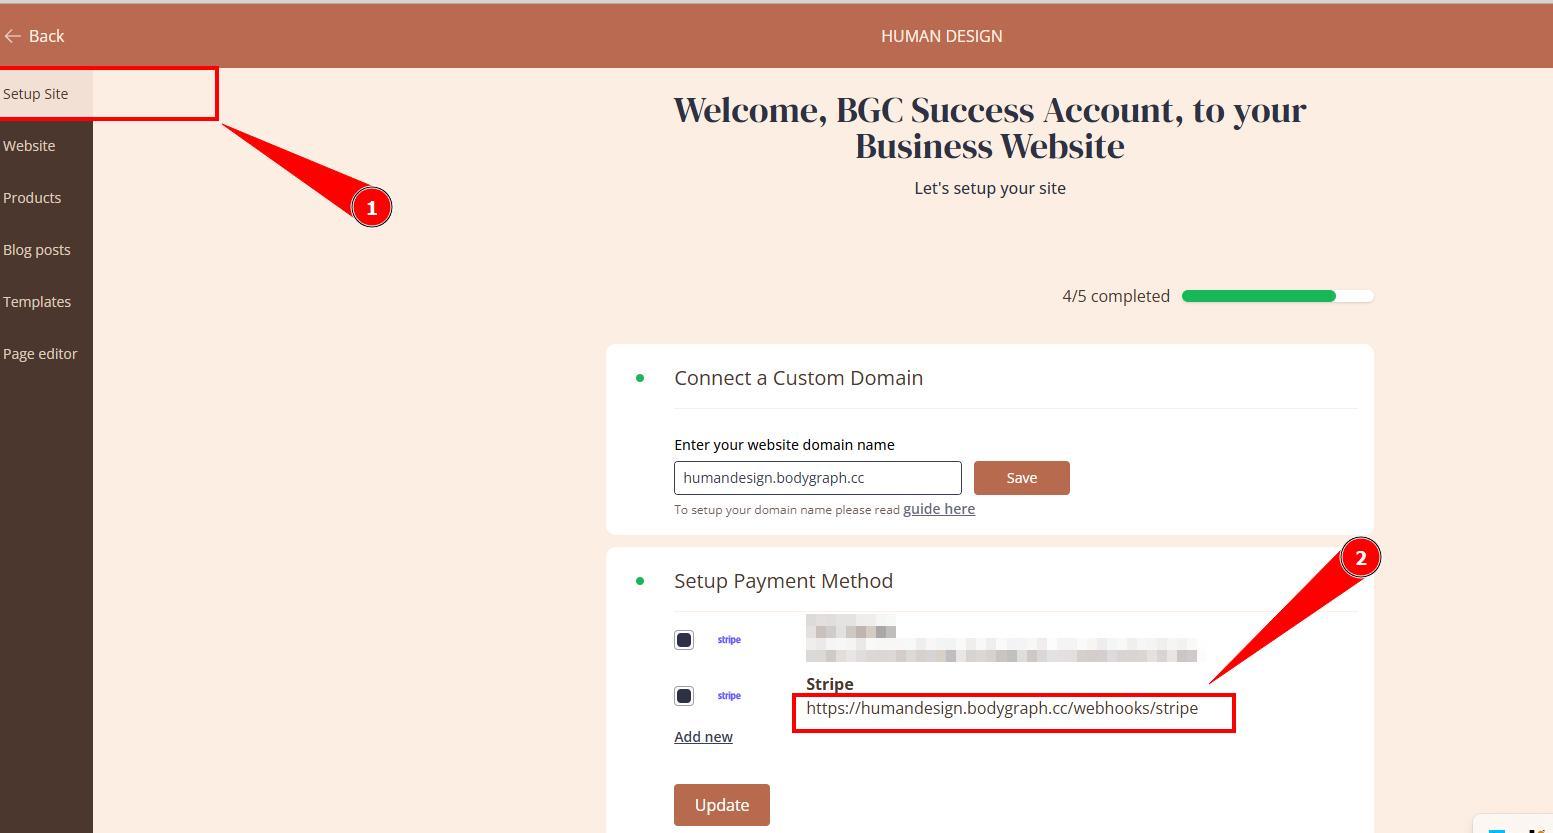
9. Copy Webhook URL and go back to Stripe account tab.
10. Click Developers menu at the bottom left corner and select Webhooks option.
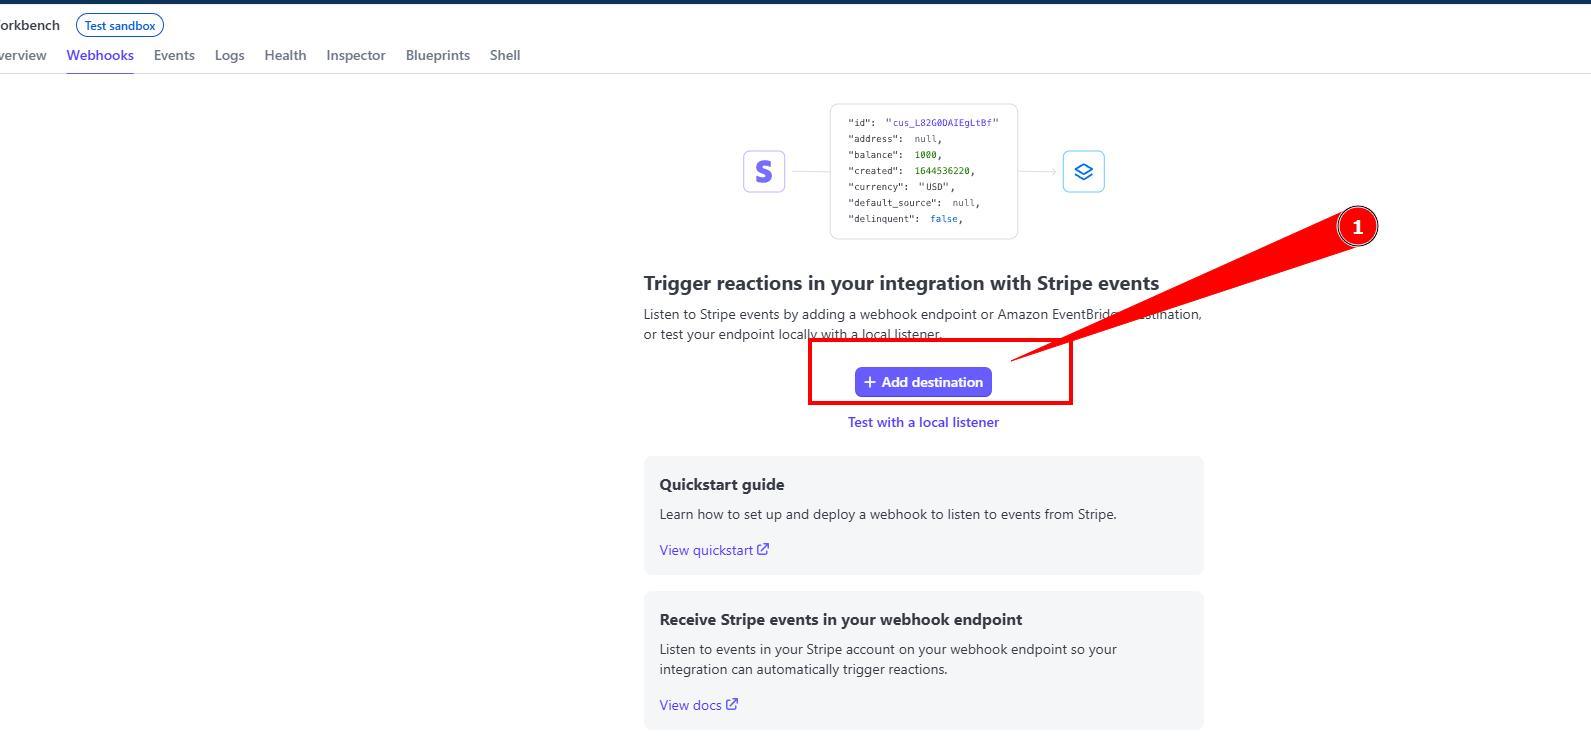
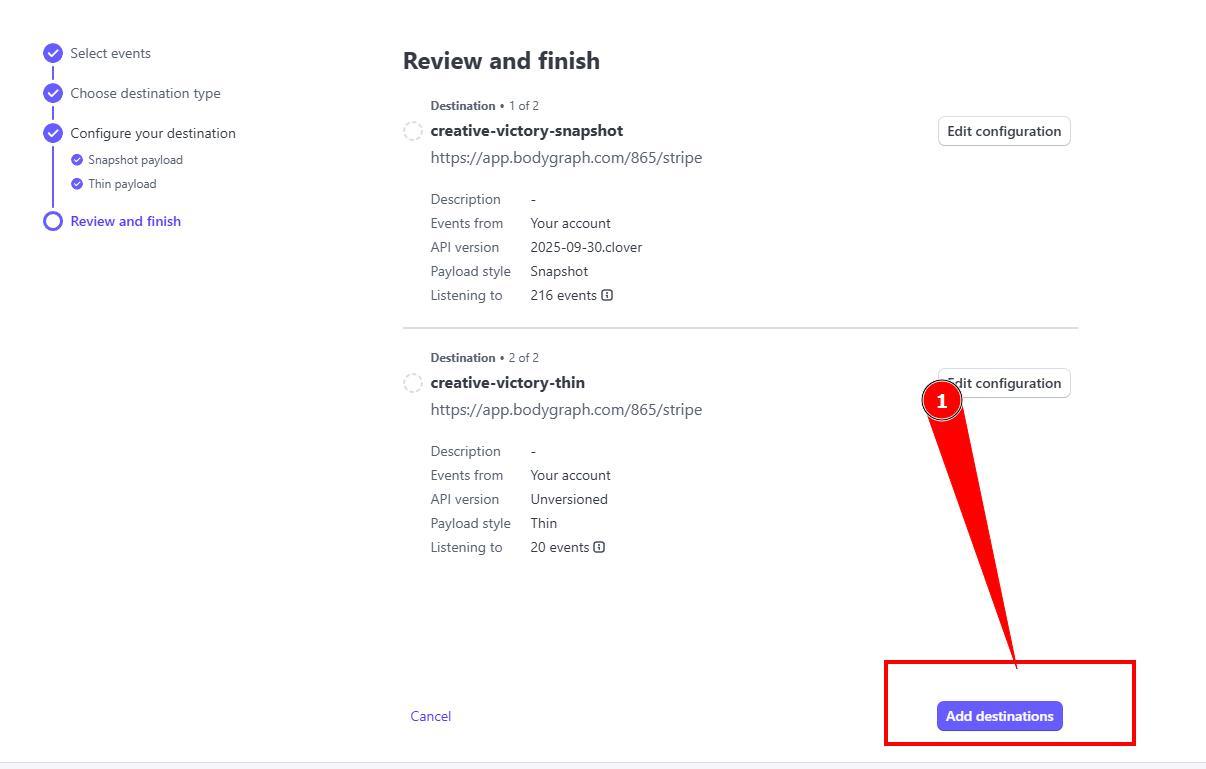
11. Click Add destination.
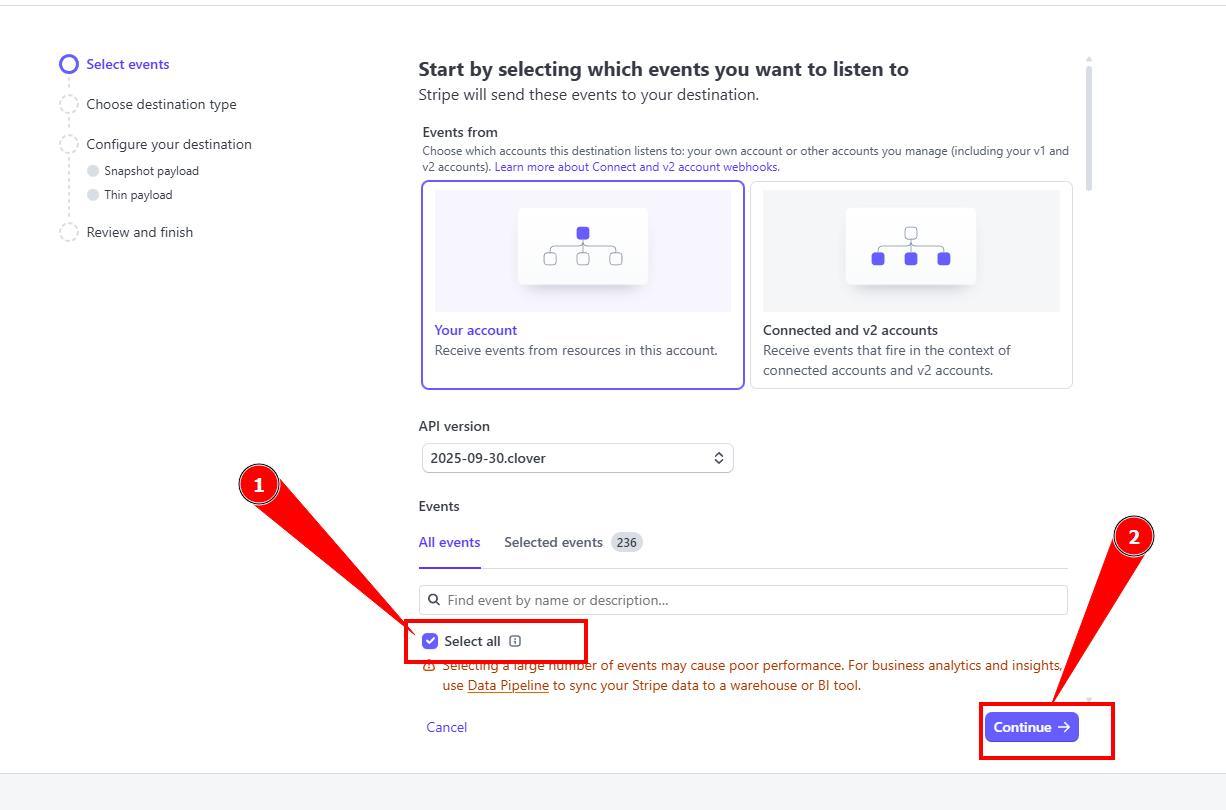
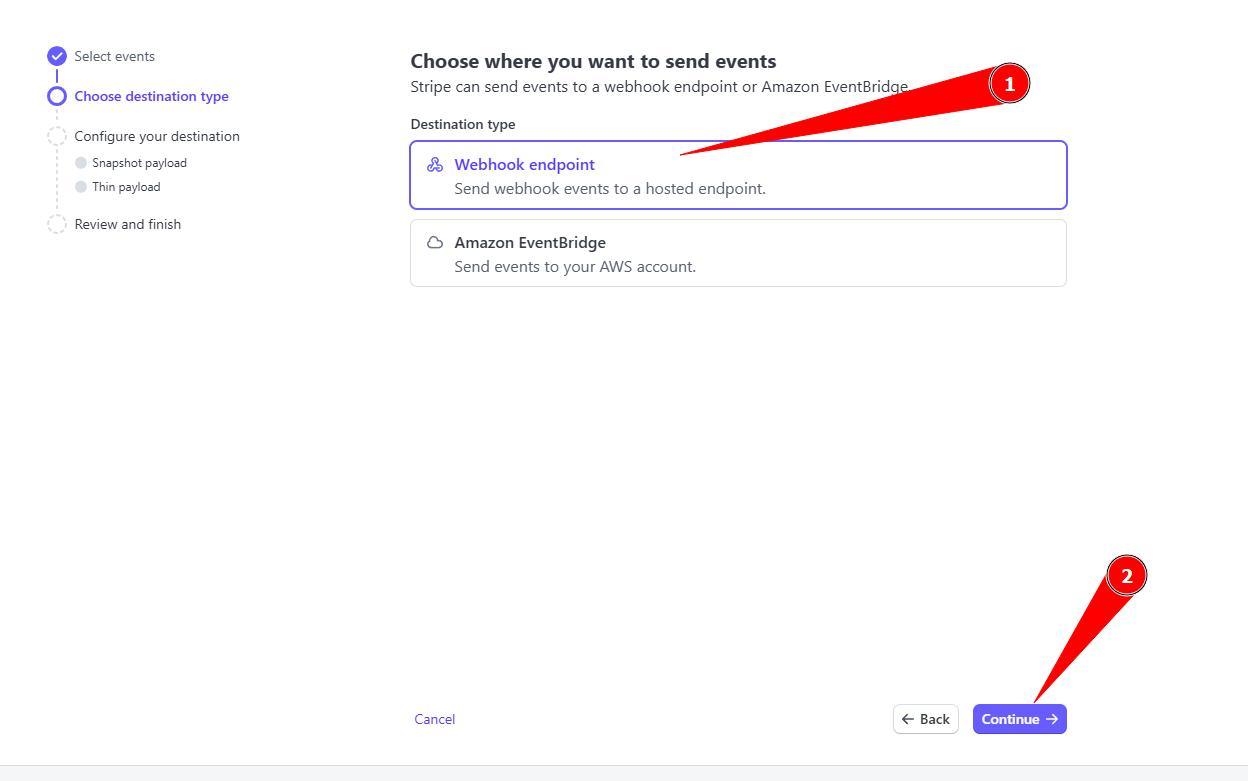
12. Tick the box Select all events and then Continue.
13. Select Webhook Endpoint (usually selected by default) and press Continue.
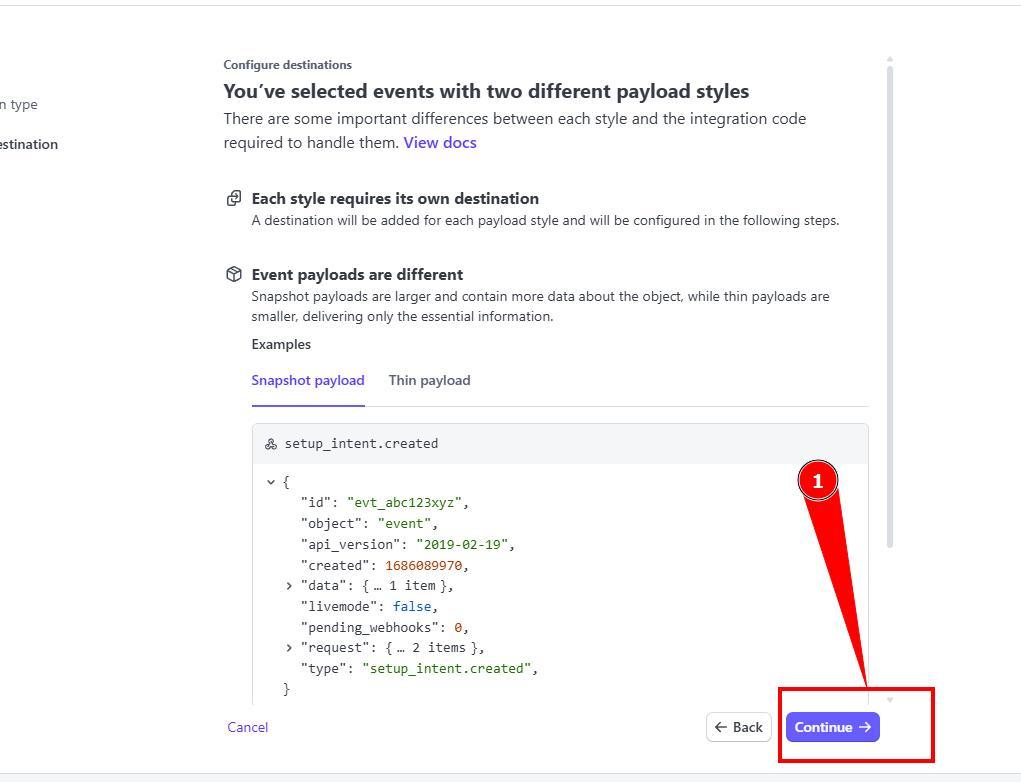
14. You will see notification about events, no changes needed, just click Continue.
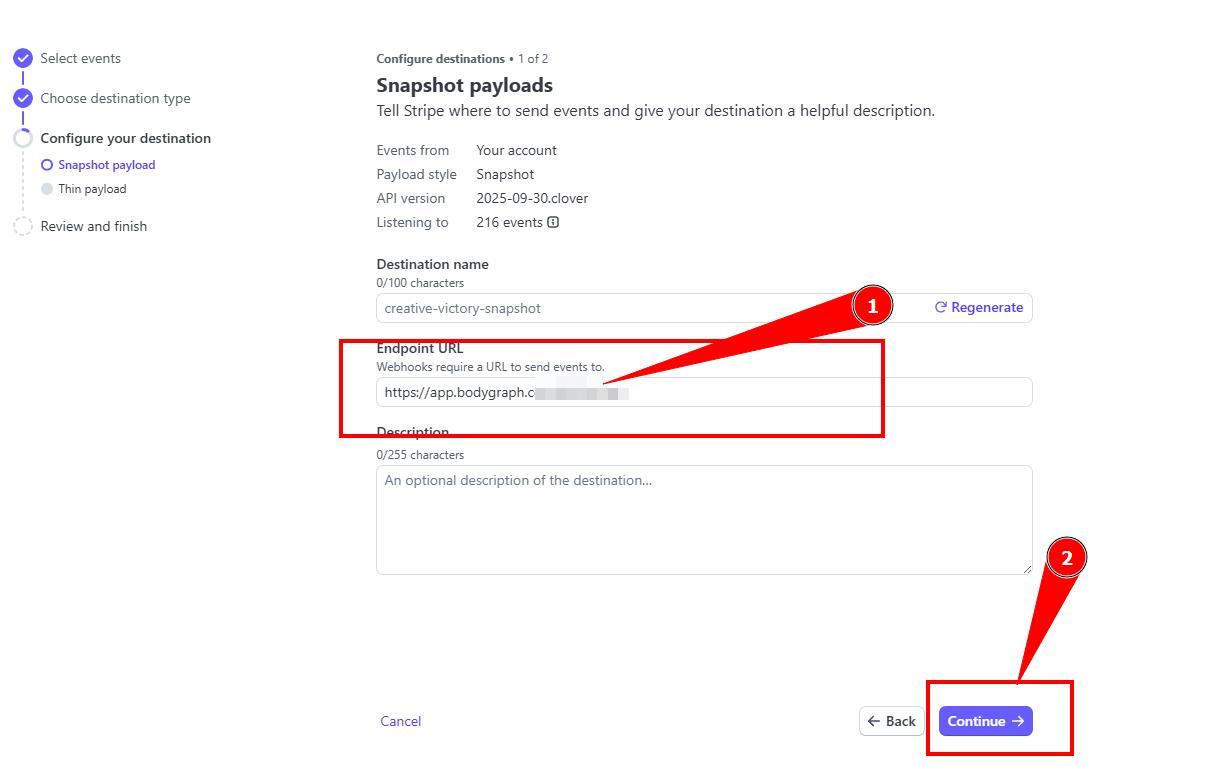
15. Paste webhook URL and click Continue.
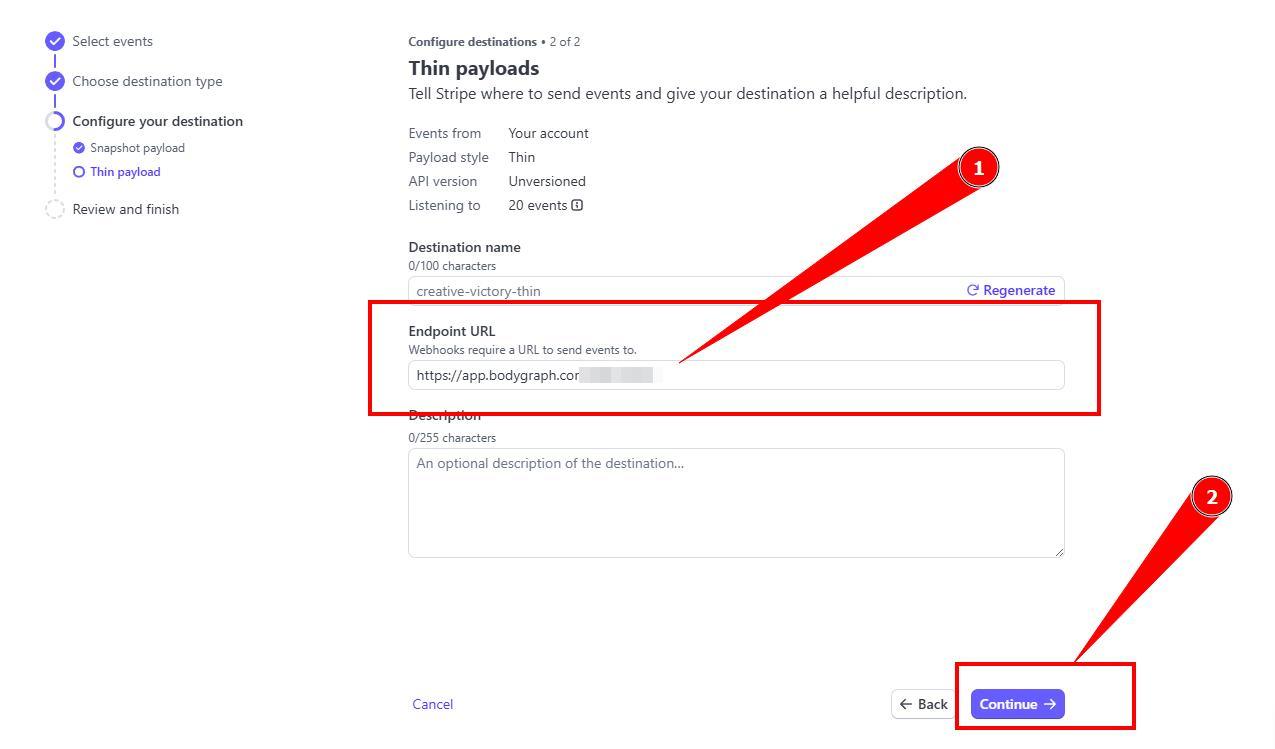
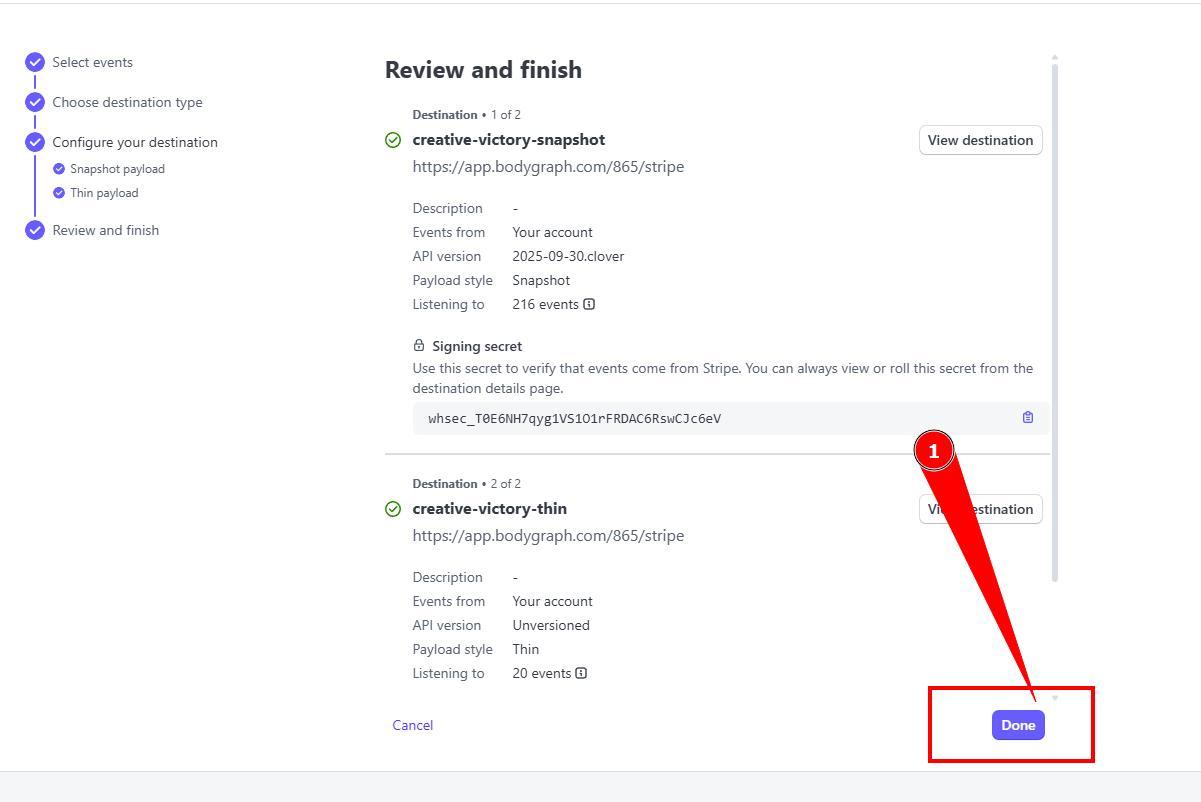
16. Paste webhook URL again and click Continue.
17. Confirm the the step by clicking Add destination and then Done.
Important note: If you are using Bodygraph’s Website Builder (or it’s shop only) you will require to complete steps 10-17 and add one more webhook from Website builder settings.
IMPORTANT: if you switch from test mode to live or other way around it will require to add webhooks again.
18. Now you can set reports payment method and test live purchase yourself before offering sales for your clients.
Check the video tutorial below:
Related articles:
Setting price and currency for reports
Still have questions, is above guide outdated? Please message us on Live Chat or send an email to support@bodygraph.com.