You can export an existing language from the Chart Content tool, edit the text in Excel, and then import it back into the platform. This is useful if you want to translate the content into another language or customize the wording to match your voice.
Export a Language
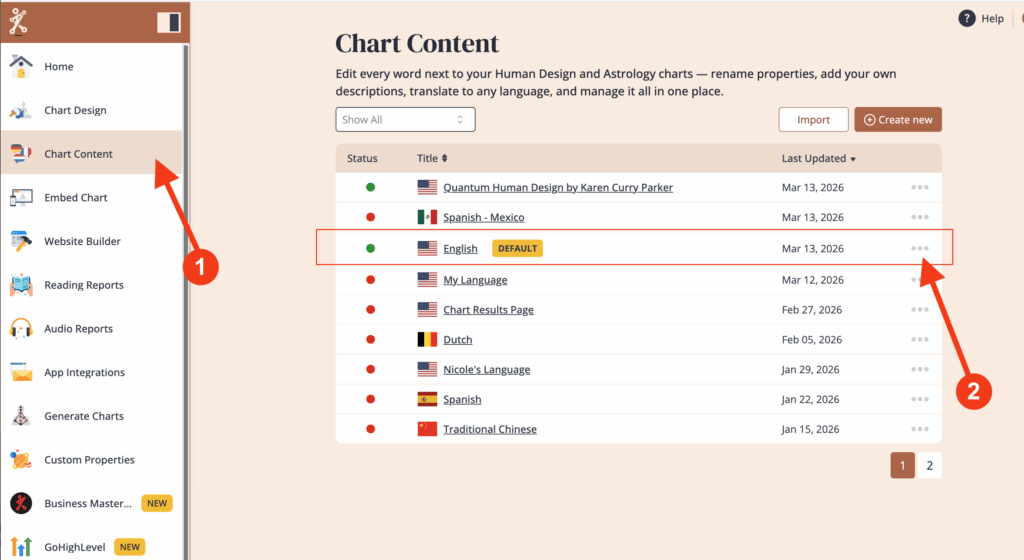
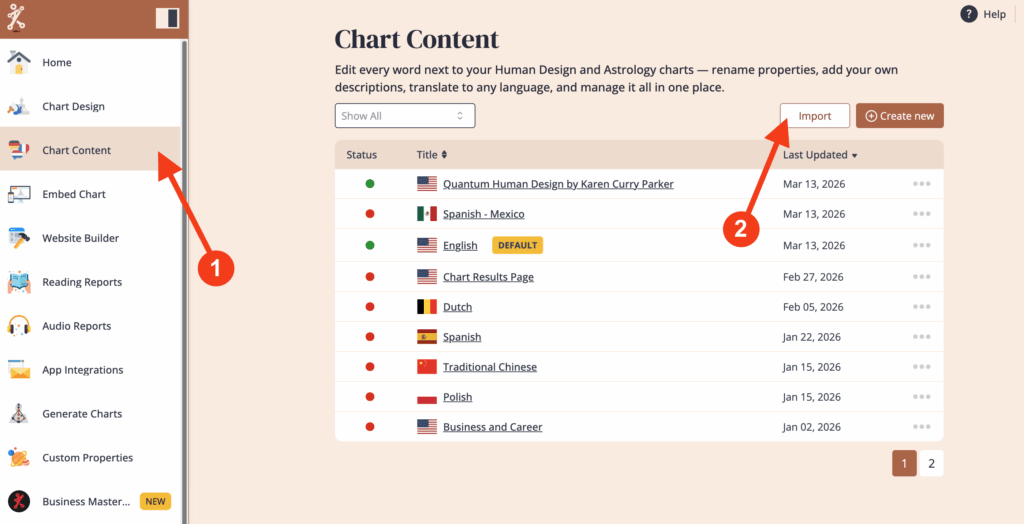
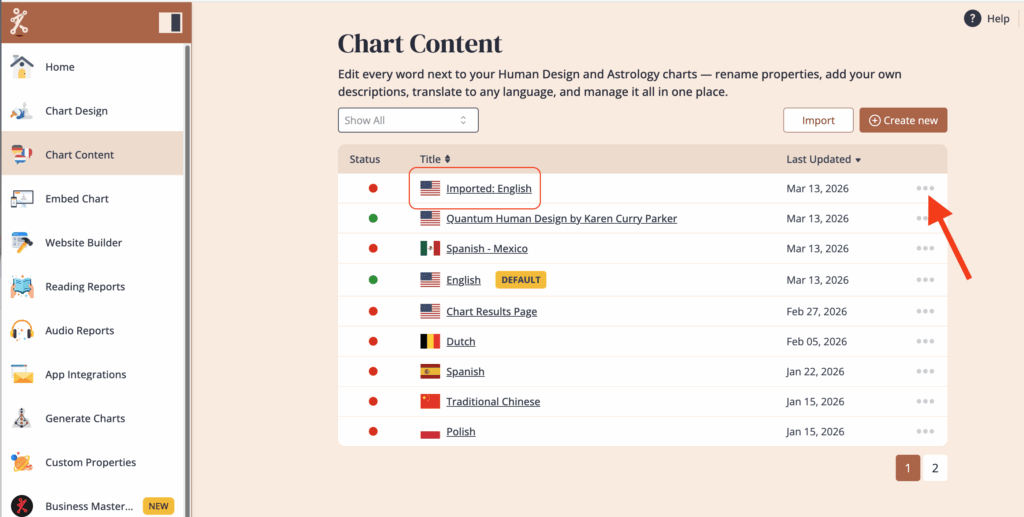
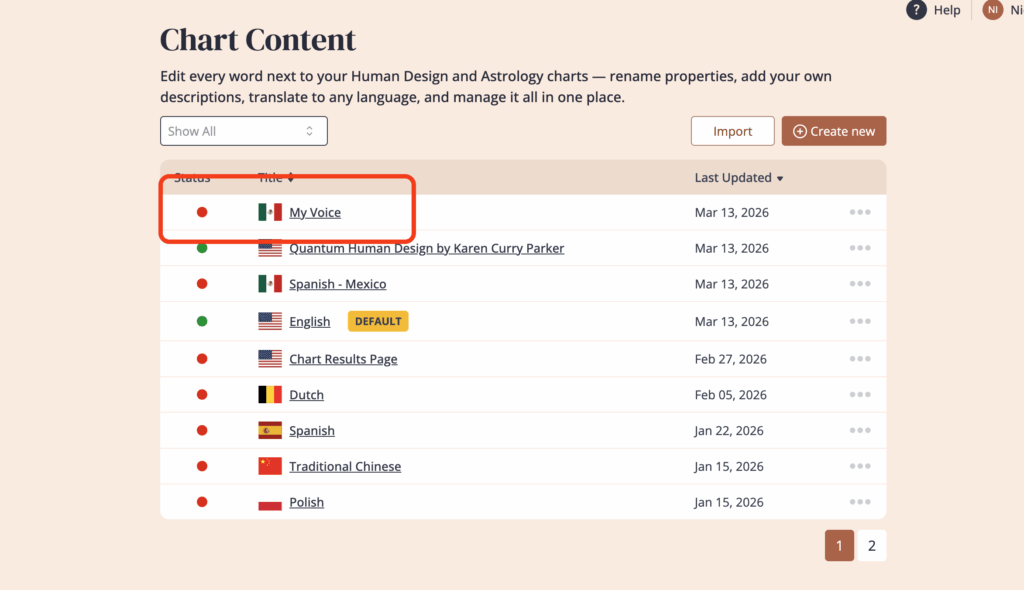
Go to Chart Content. Select the language you want to edit or use as a template. Click on the three dots next to your chosen language.
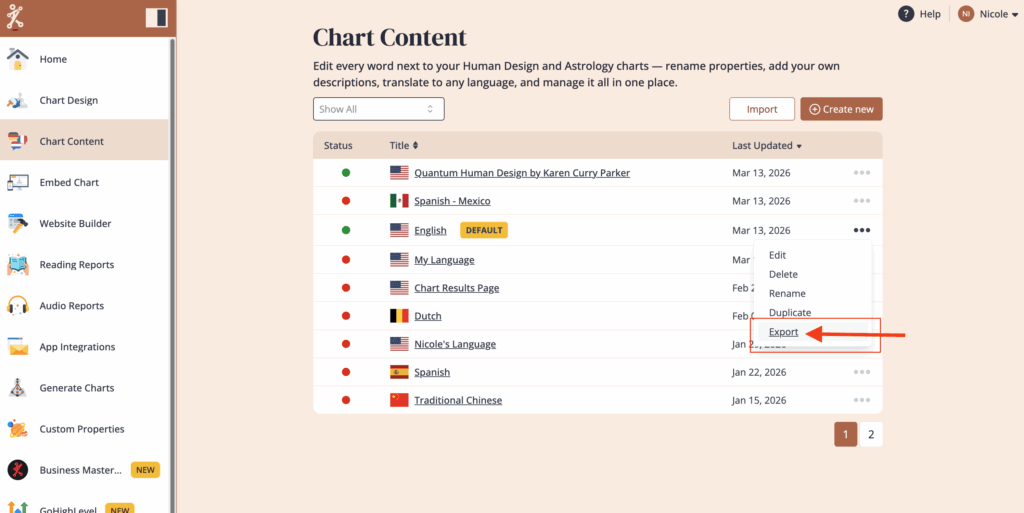
Select Export.
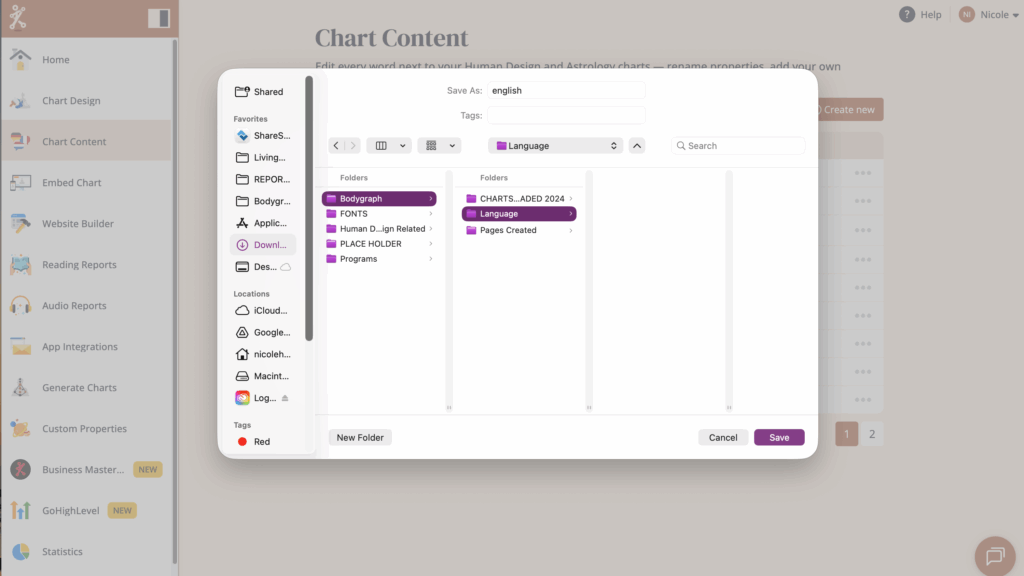
Save the file to your device. Pay attention to where you save this file so you can find it, open it and make your edits.
Edit the Language File
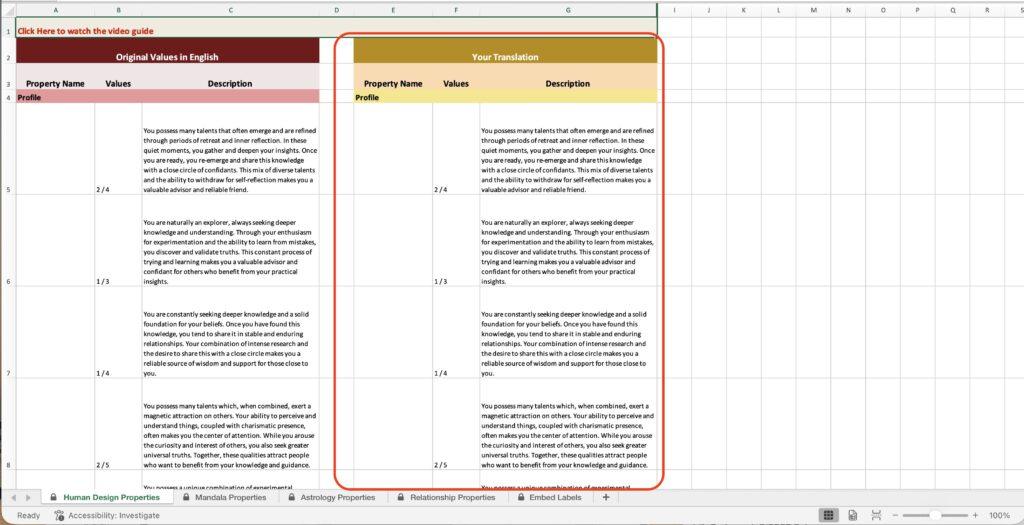
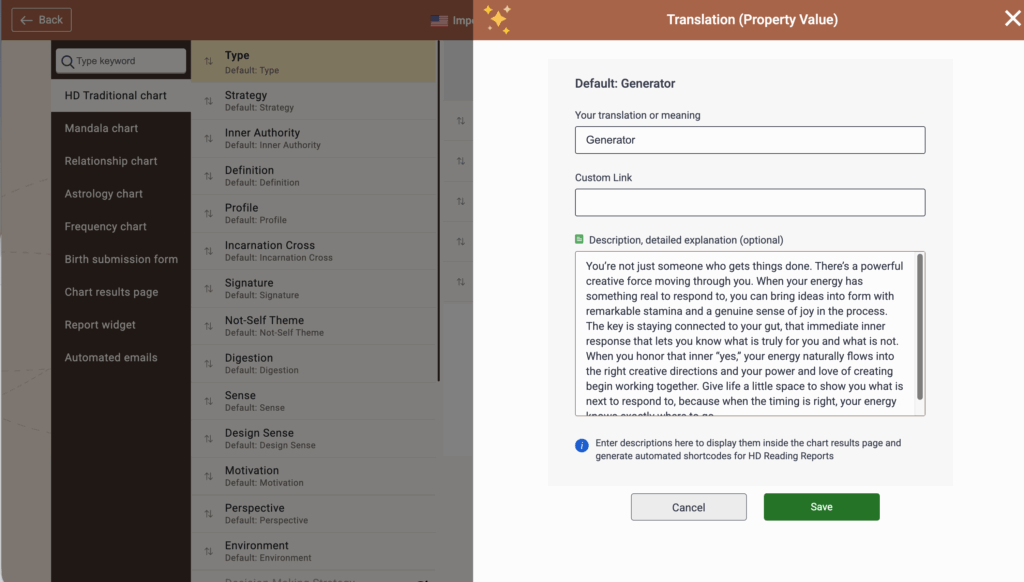
Open the exported file in Excel or Google Sheets. You will see two columns. The left column contains the default system text and cannot be changed.
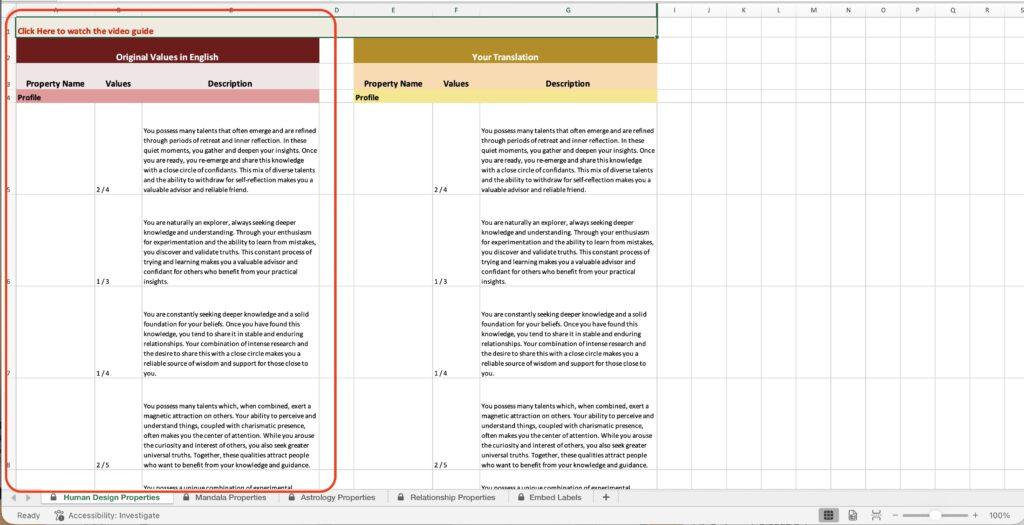
The right column is where you can edit the language. Make the changes you want such as translating the text into another language, or adjusting the wording to reflect your brand voice. Be sure to save your changes periodically while editing.
Important:
- The file must remain in the original
.xlsxformat for import. - Do not add or remove columns, rows, or tabs in the file.
- If some of the fields appear as Locked/Password protected, please upgrade office tools or try opening the file at Google Sheets.
Import the Edited Language
Go to ‘Chart Content’ and click on ‘Import’ in the upper right corner.
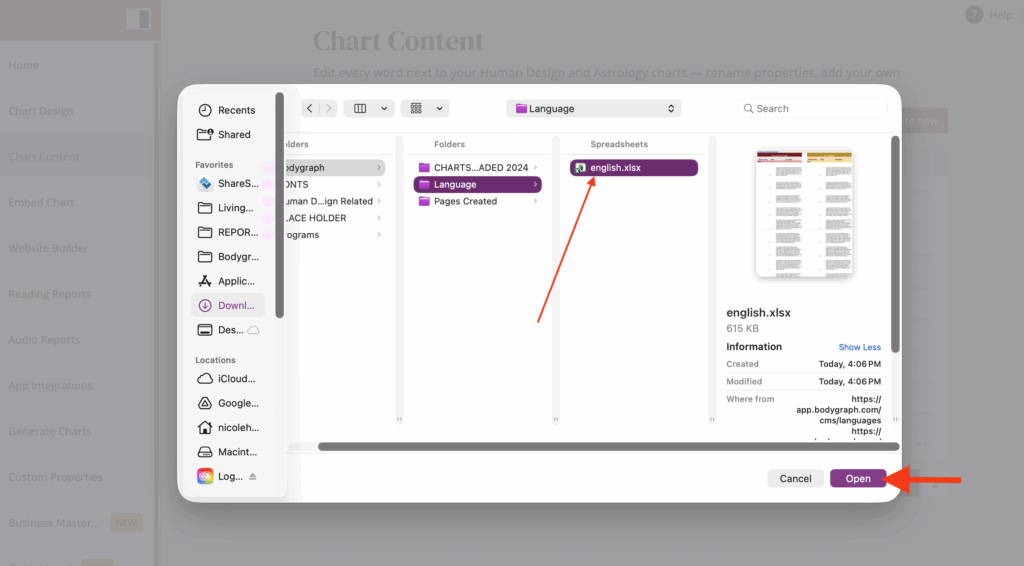
Find the Excel file that you edited and click ‘Open’
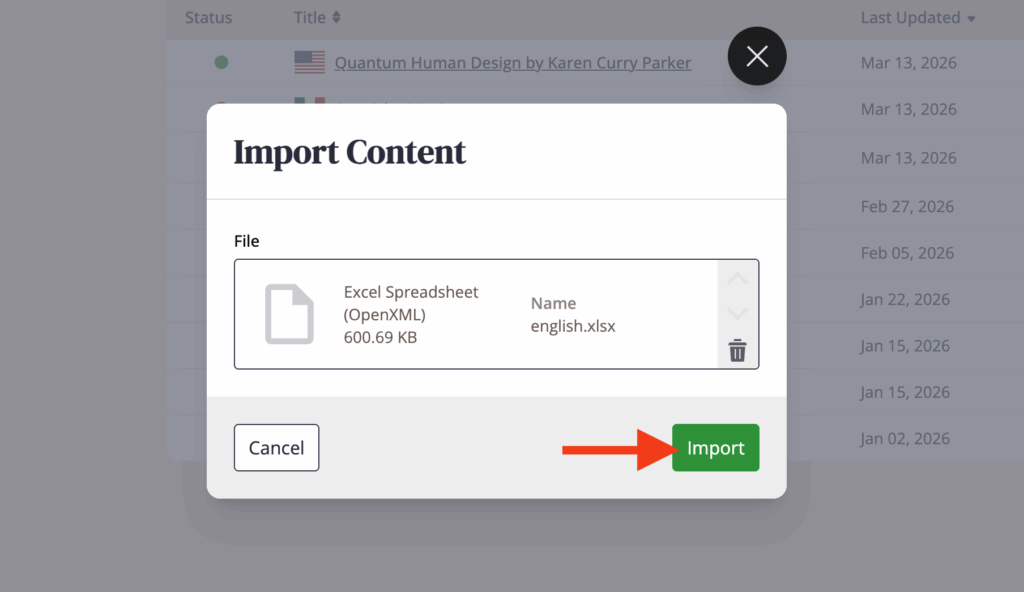
Then click ‘Import’
A new language will be created in Chart Content and it will open automatically. Review the imported language to confirm that your edits appear correctly.
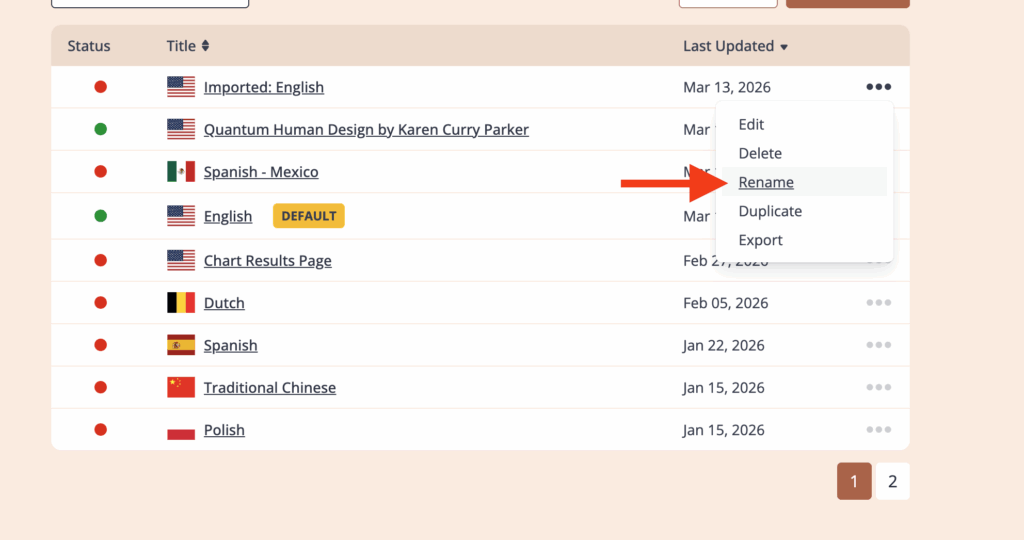
Return to the list of languages in ‘Chart Content’ and you will see the new language file labeled ‘Imported:’ Click on the three dots next to the language.
Click on ‘Rename’
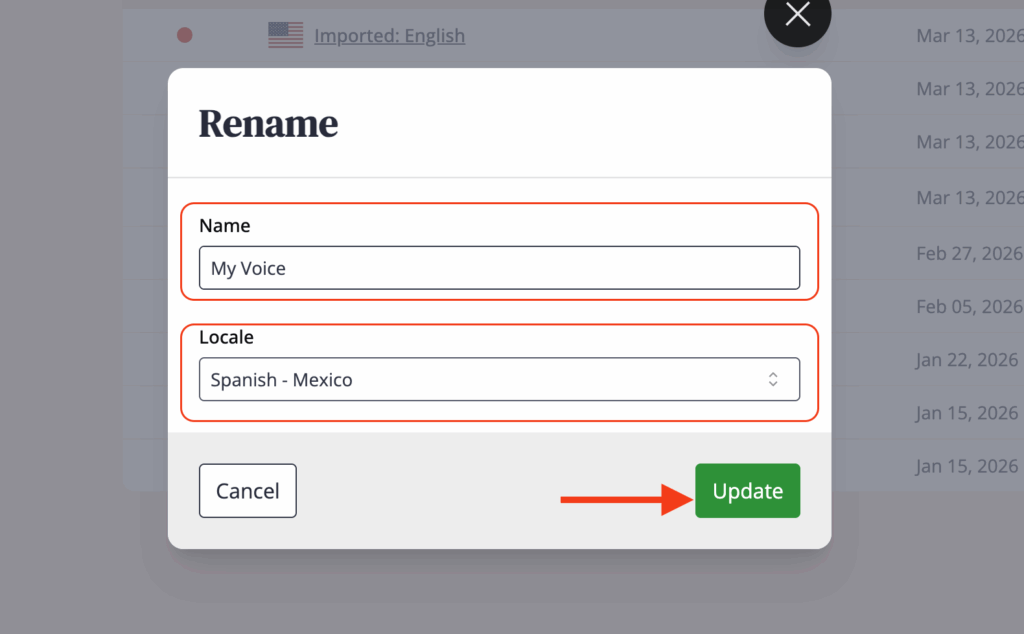
Give your new language a name, and then select the spoken language. This will put the flag next to the language.
Your new language is now ready to use for your charts and reports.
Still have questions, is above guide outdated? Please message us on Live Chat or send an email to support@bodygraph.com.