Before you start Google sheets set up, go and create Zapier account (login if you already have one).
Set up connection
1.Create Google Sheets spreadsheet. Give spreadsheet and sheet a title so it will be easy to identify at Zapier:
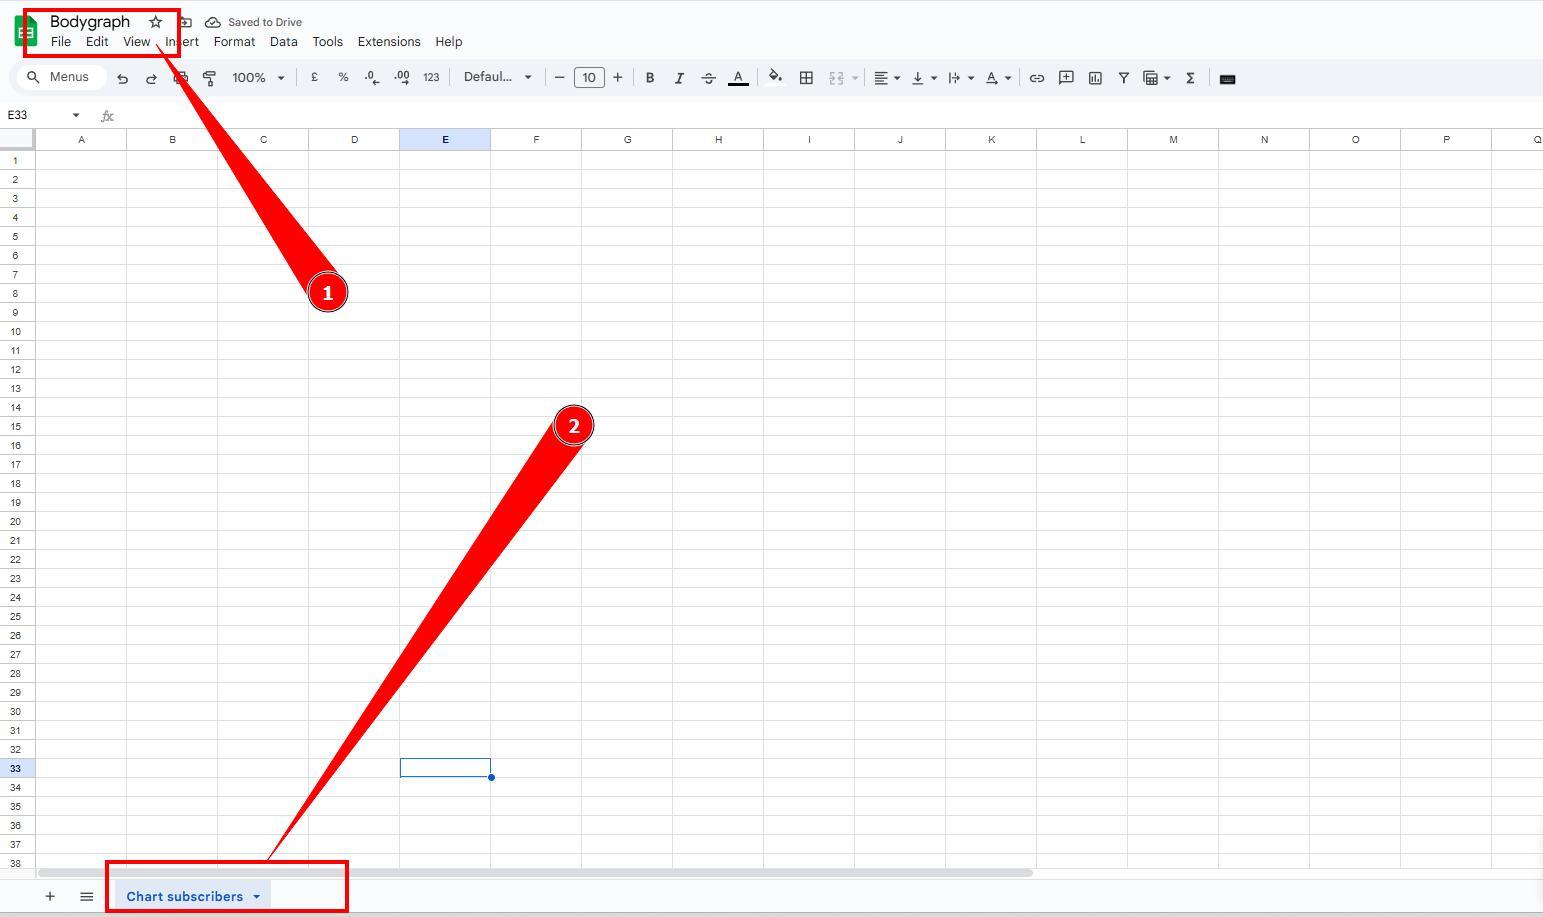
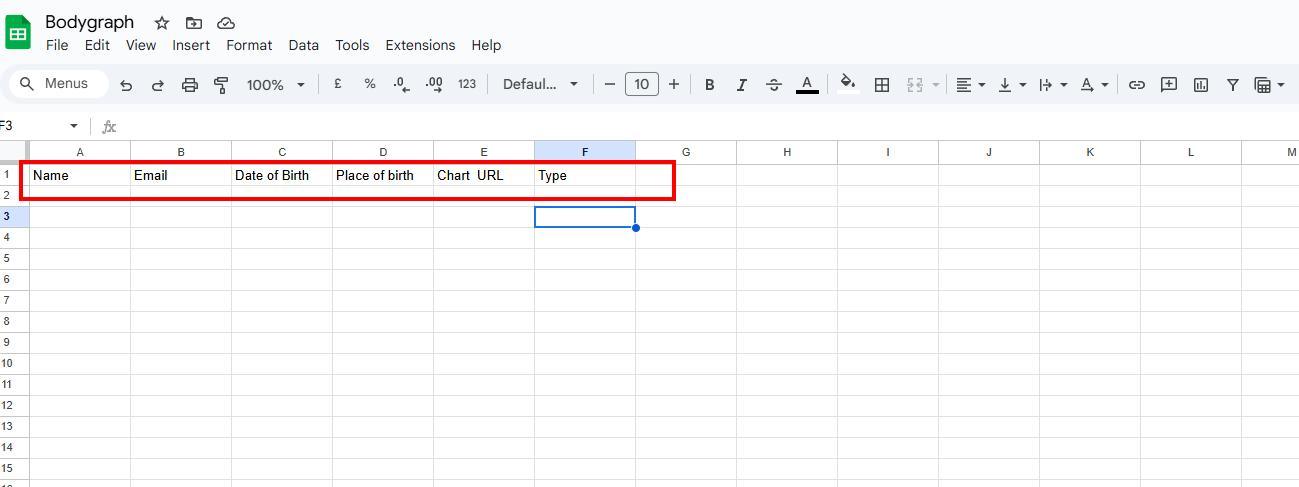
2.Create and name the tabs of the information that you want to collect (at the Zapier you will be able to see full list of data and add columns, if you wish, later):
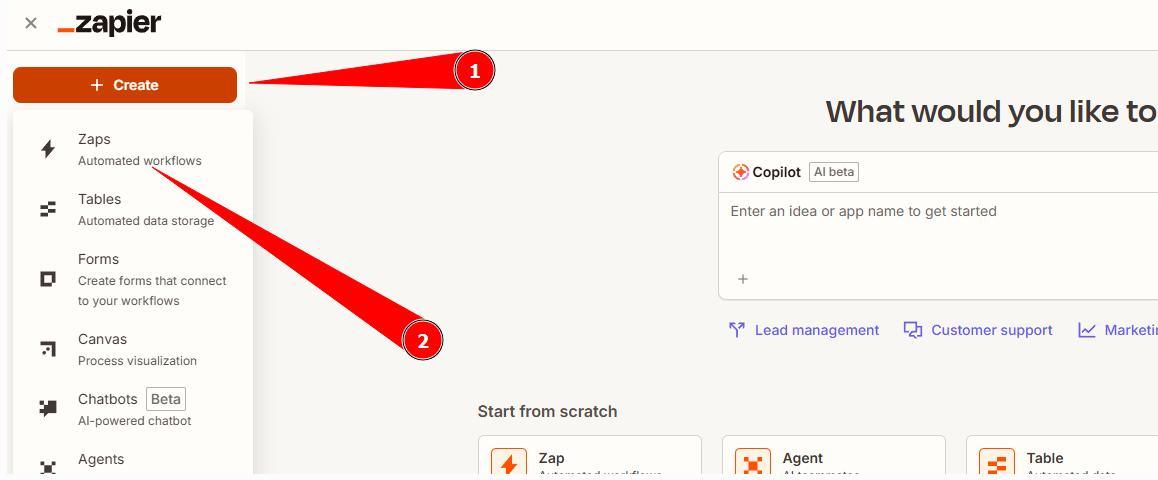
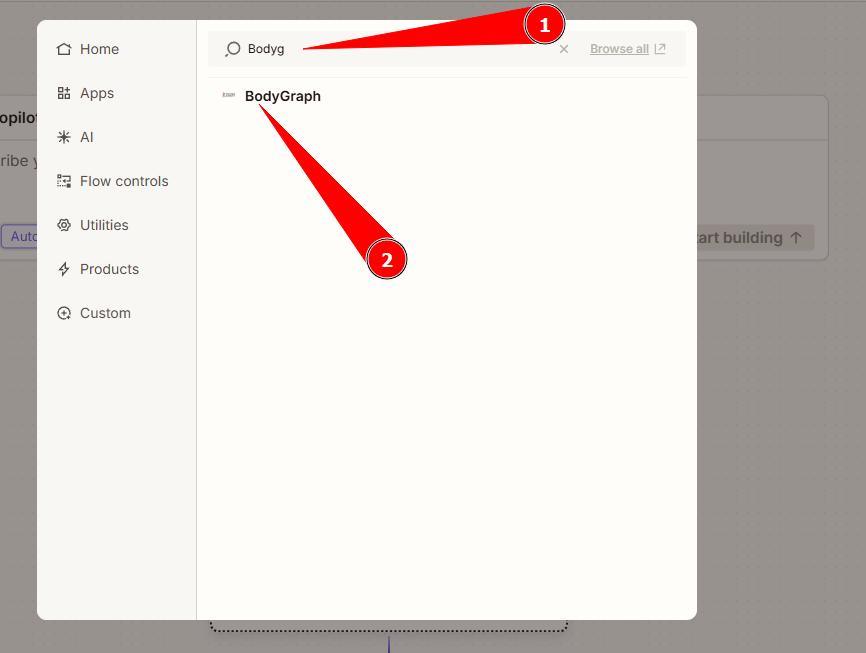
3. On the different tab open Zapier dashboard and press Create Zap at the top left corner.
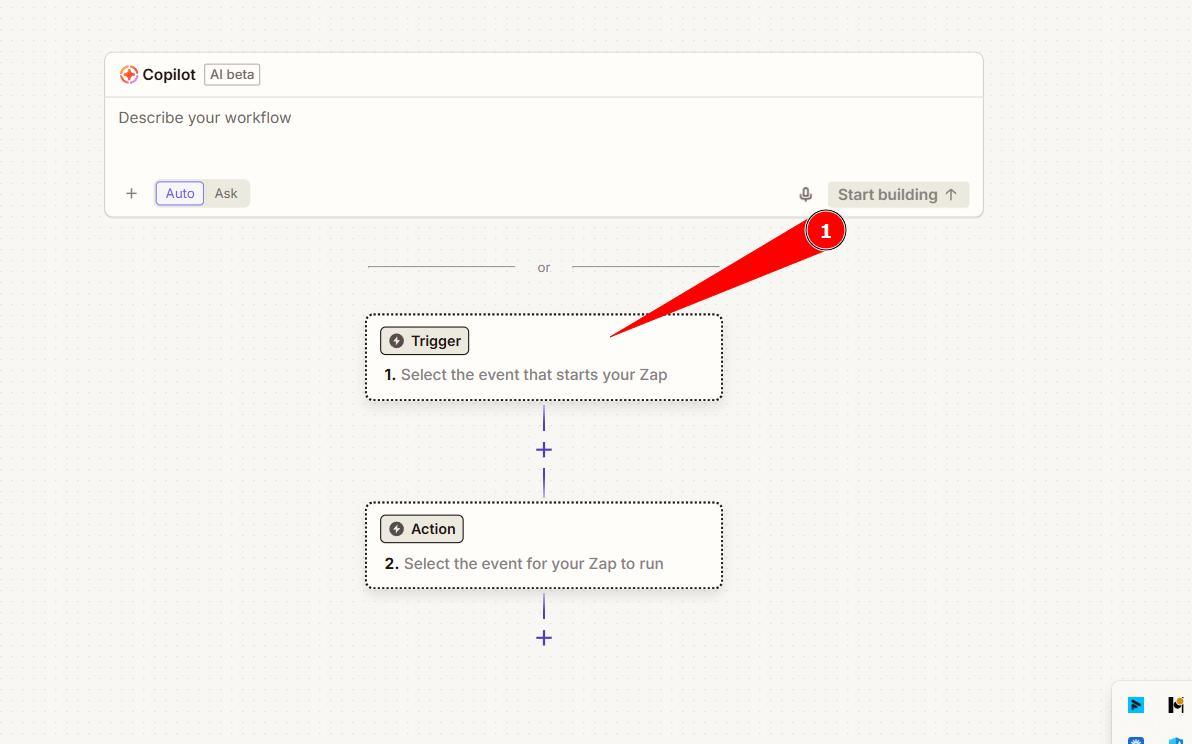
4. Click on Trigger and at the app list search and select Bodyhraph:
5. At the Trigger Event field select Chart created.
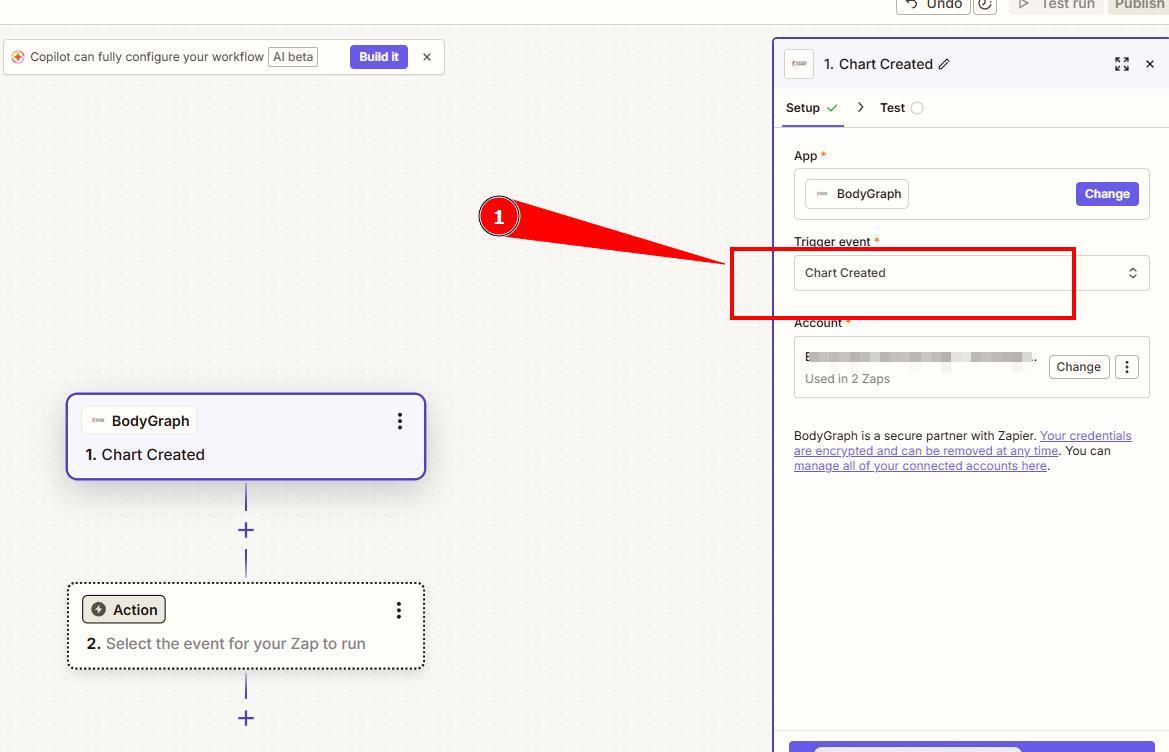
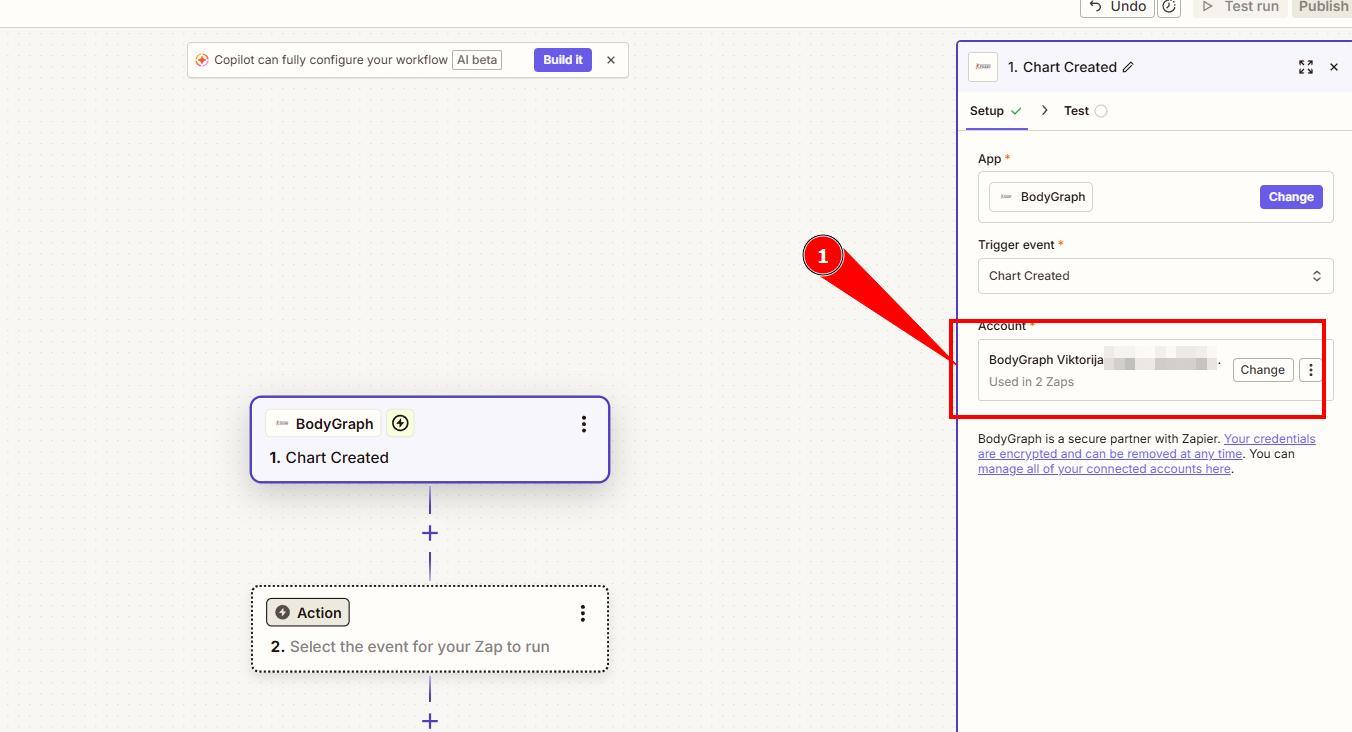
6. Click on the account section and login to your Bodygraph.com account by providing your API Key: How to find your API.
7.Press continue and then Test Trigger.
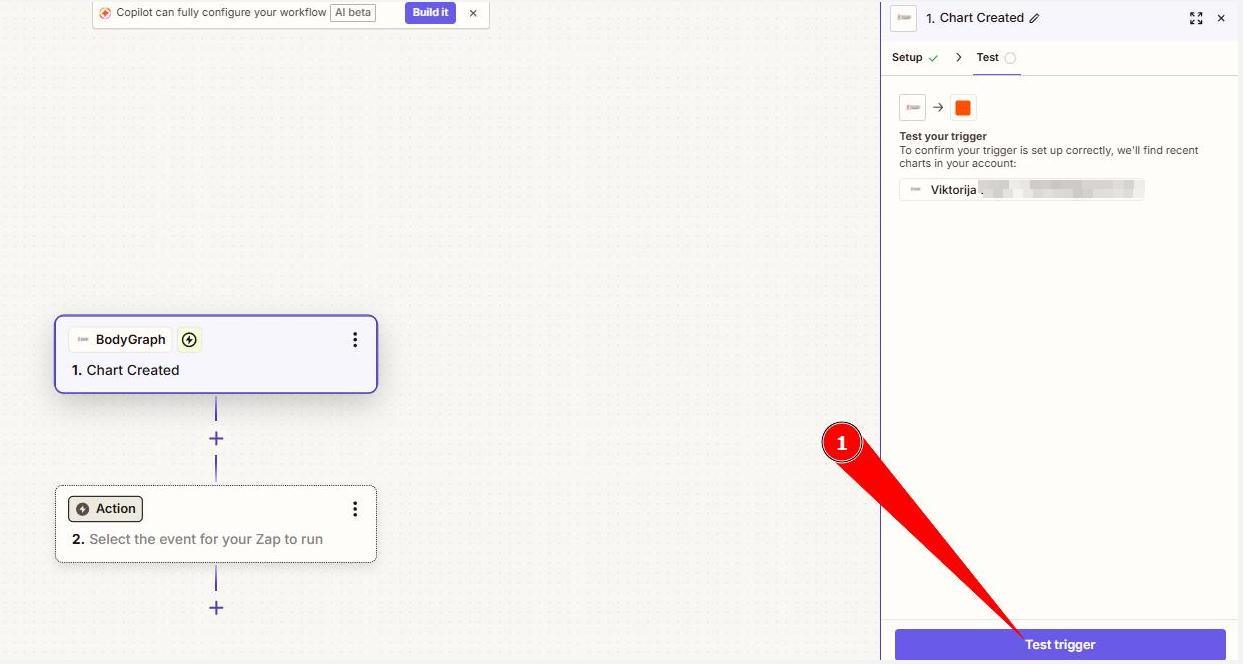
8.Chart A will be found, press Continue.

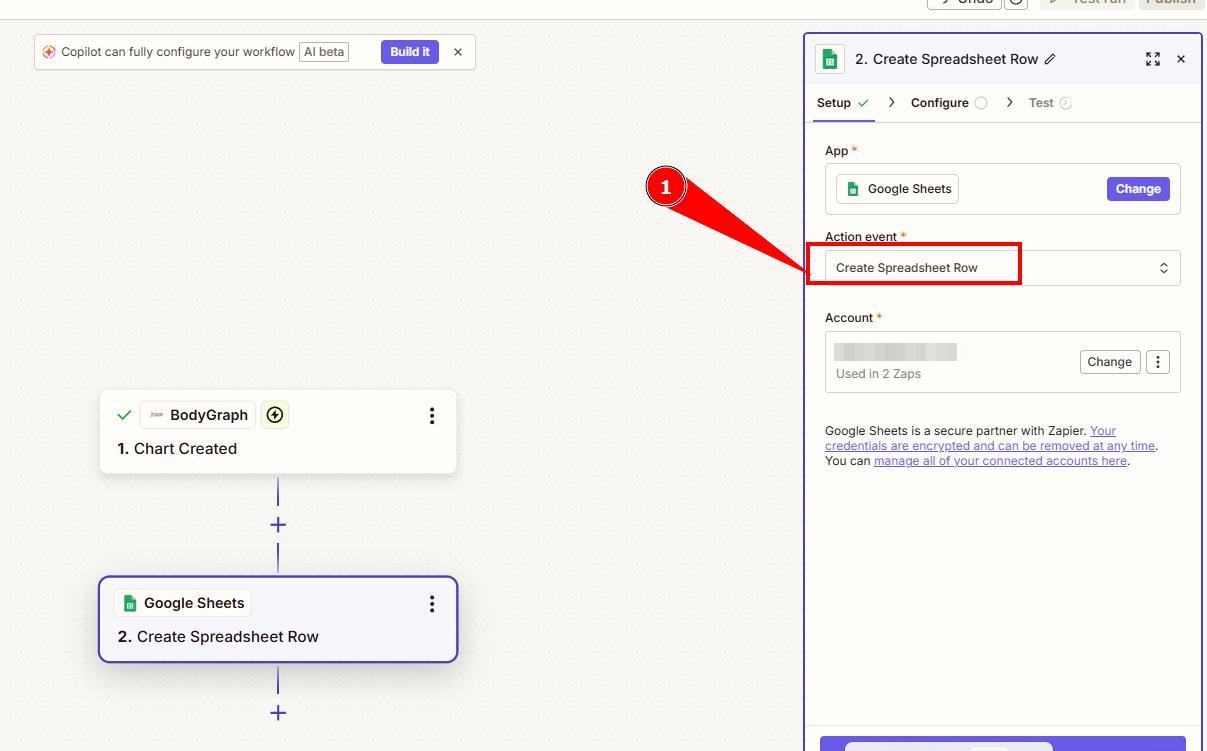
9.Search and select Google Sheets from App events list that will appear.

10.At the Action event field select Create Spreadsheet Row.
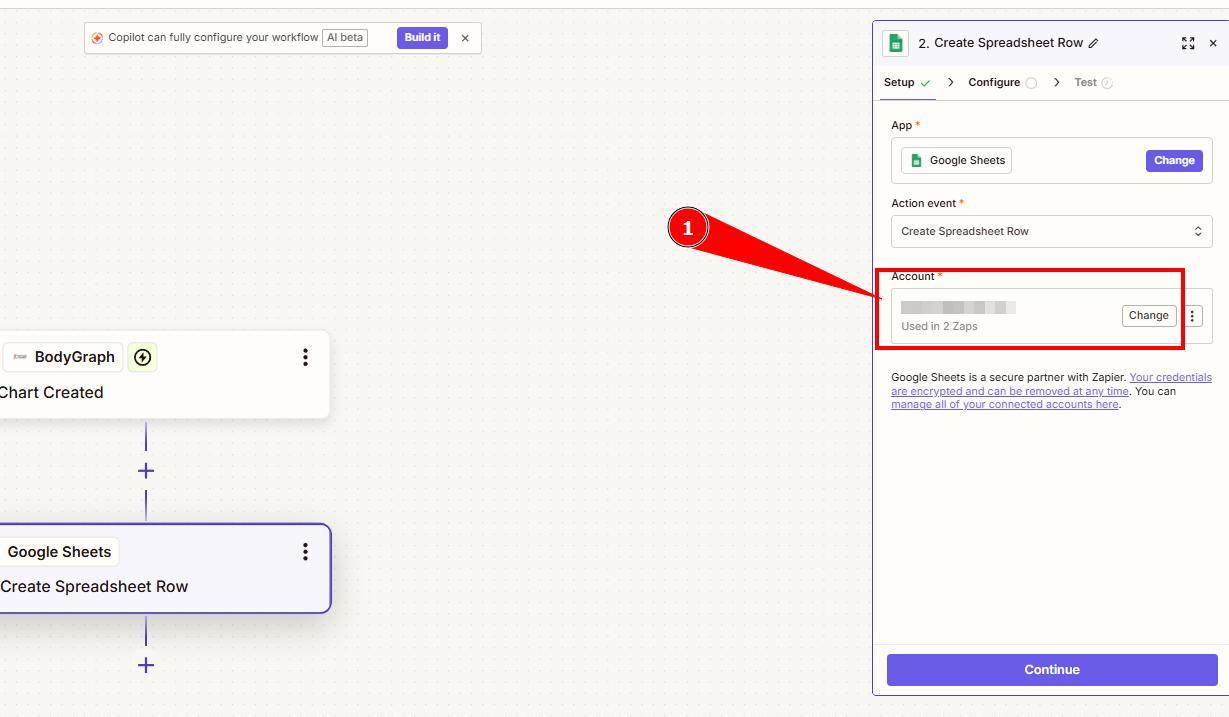
11. Click on the account field and login to your Google sheets account by providing login credentials. Click continue
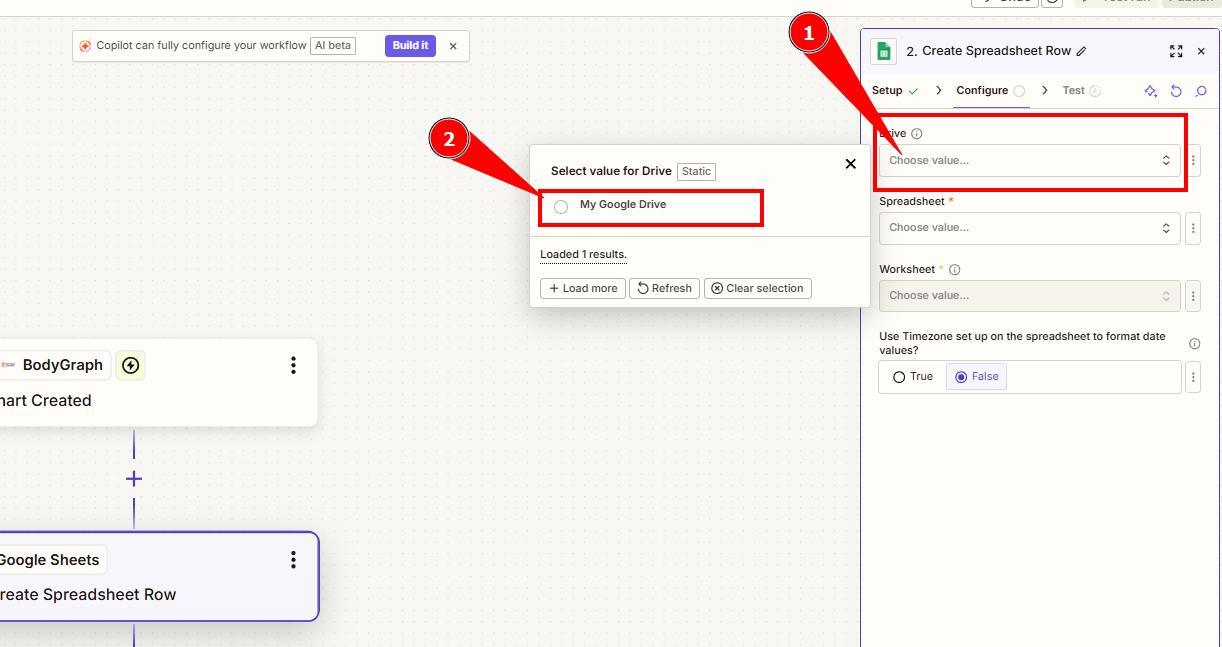
12. At the drive select My Google Drive (unless you renamed it at your google account then select that name).
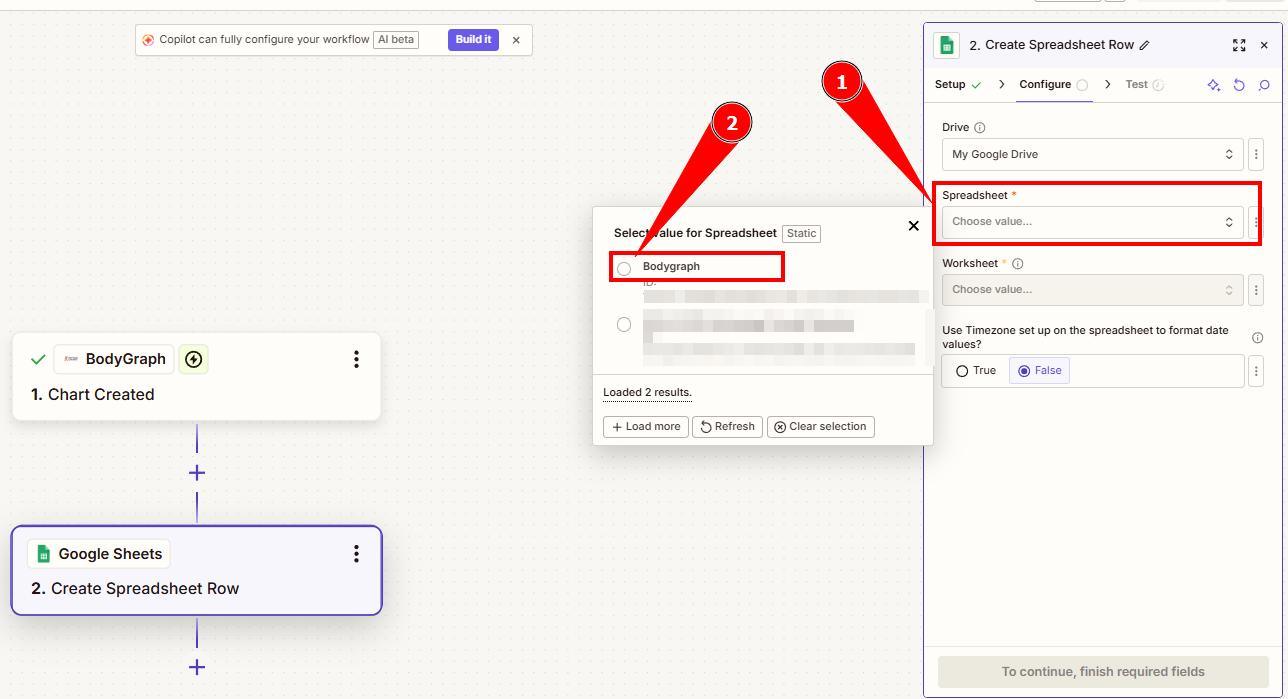
13. At the spreadsheet field select the Google Spreadsheet that you created earlier.
14. At the Worksheets select the Sheet that you created earlier.
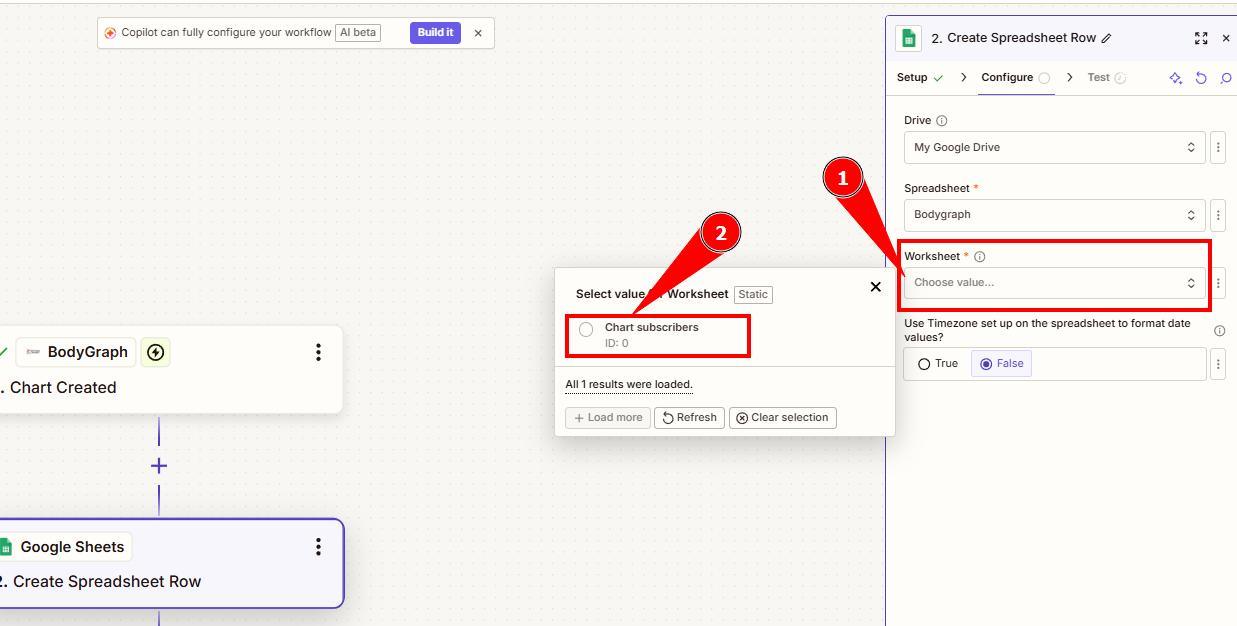
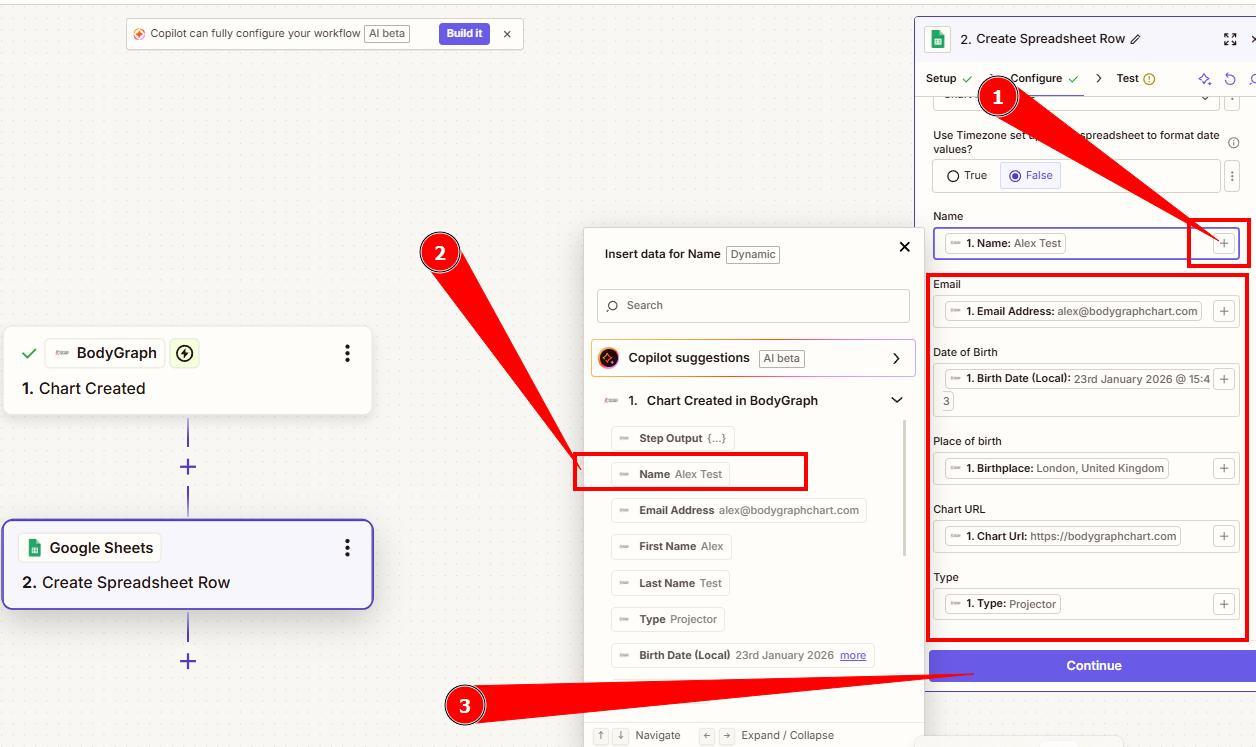
15. The list of the tabs that you created will appear.
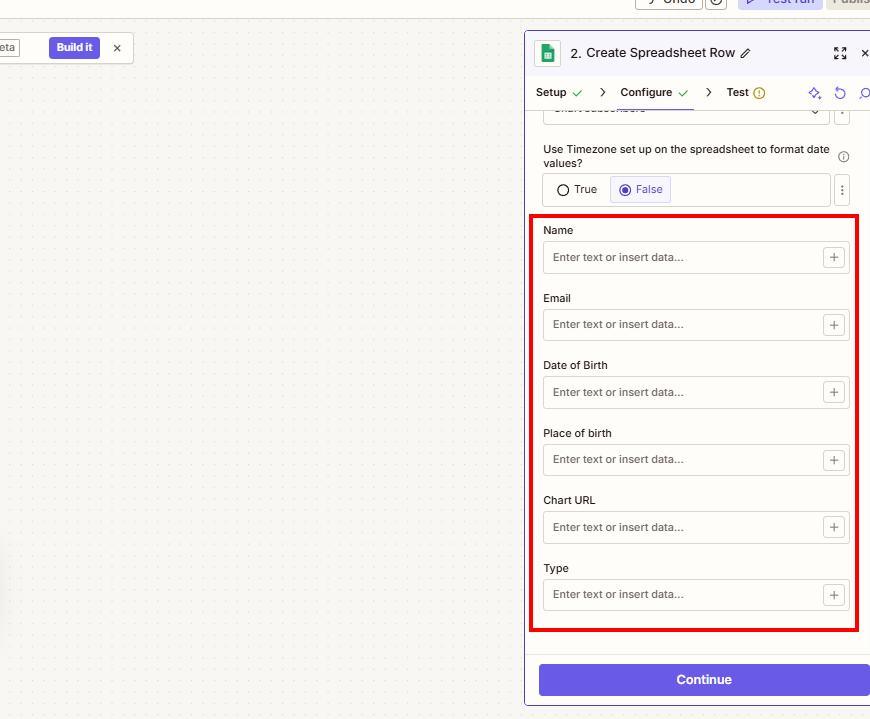
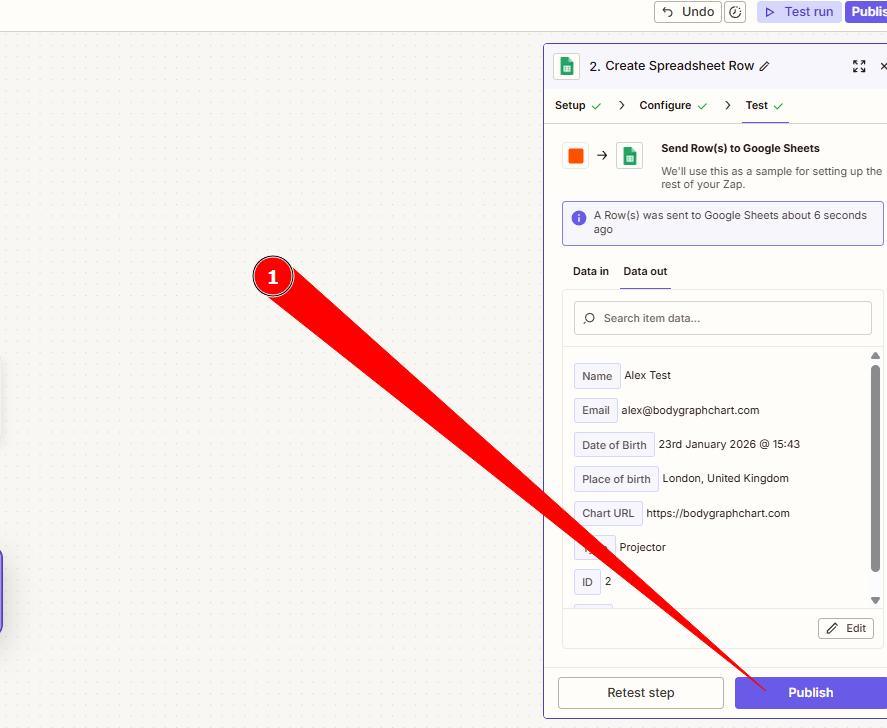
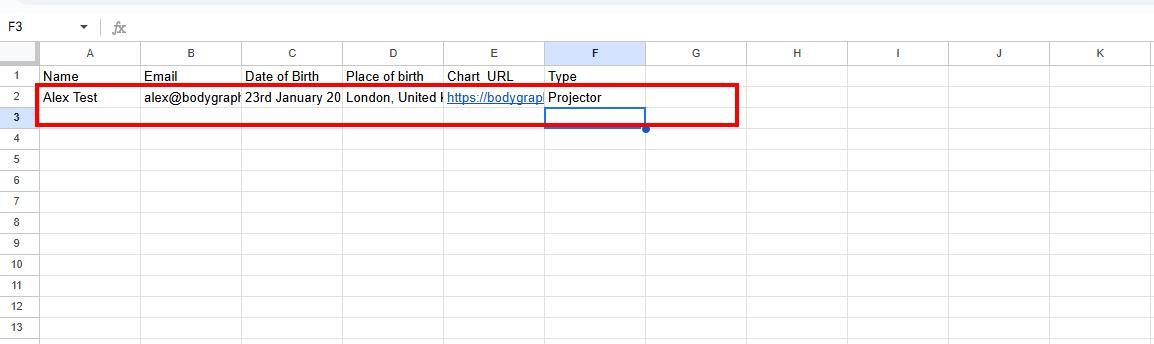
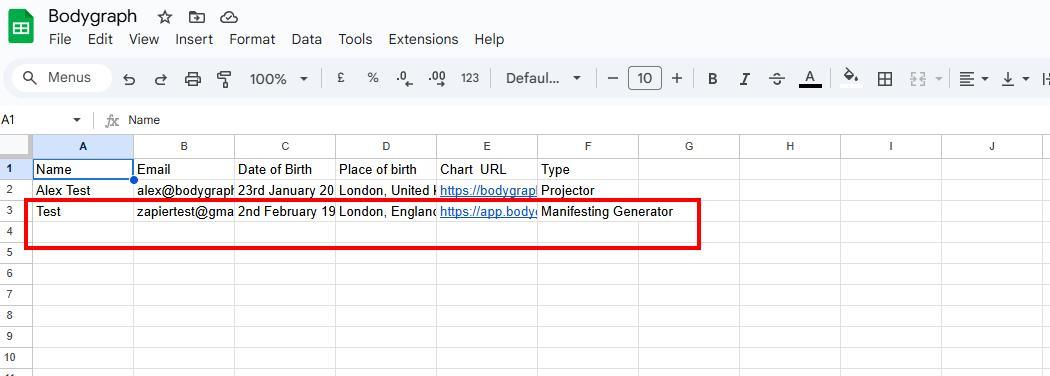
16. Click + sign next to each field and select Tag that represents that data. Click continue.
17. Click test step and Publish. Check your Google Sheets if Alex test data came through.

18. Go to your email, that you used to register with Zapier. You should have email with the Webhook link in it (title of email [BodyGraph Chart] Complete your Zap setup). Copy the url. Email will arrive to the email address associated to your Bodygraph account.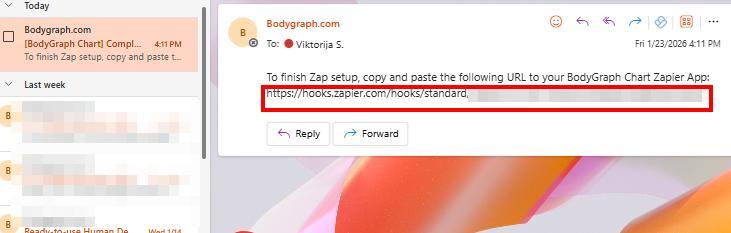
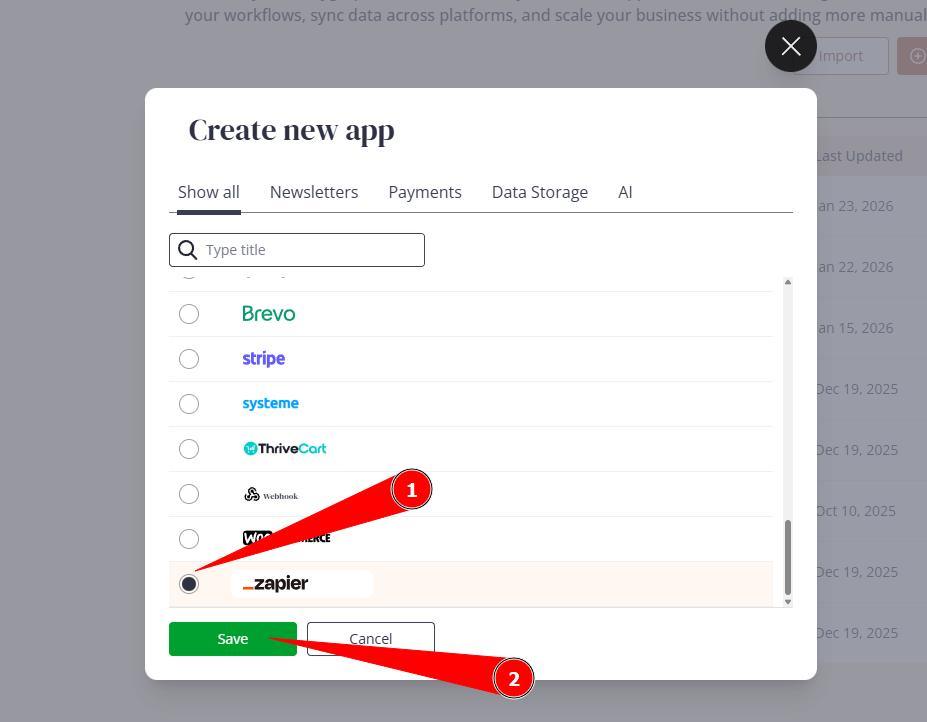
19. On different browser tab open Bodygraph chart and go to App Integration section. Press ‘Create new’ button.

20. Select Zapier and click Save.
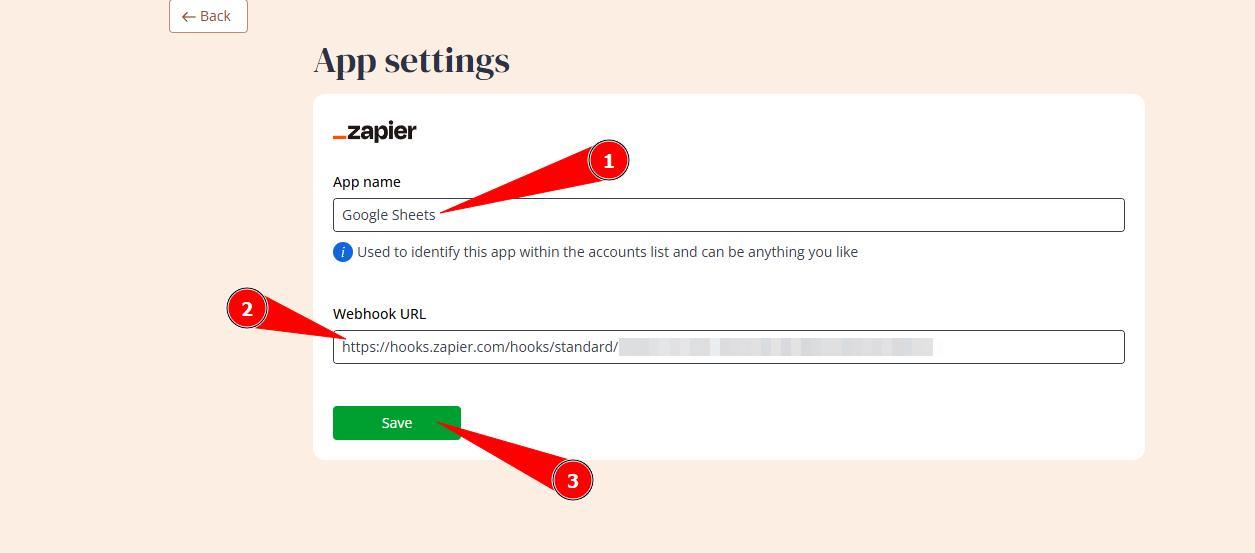
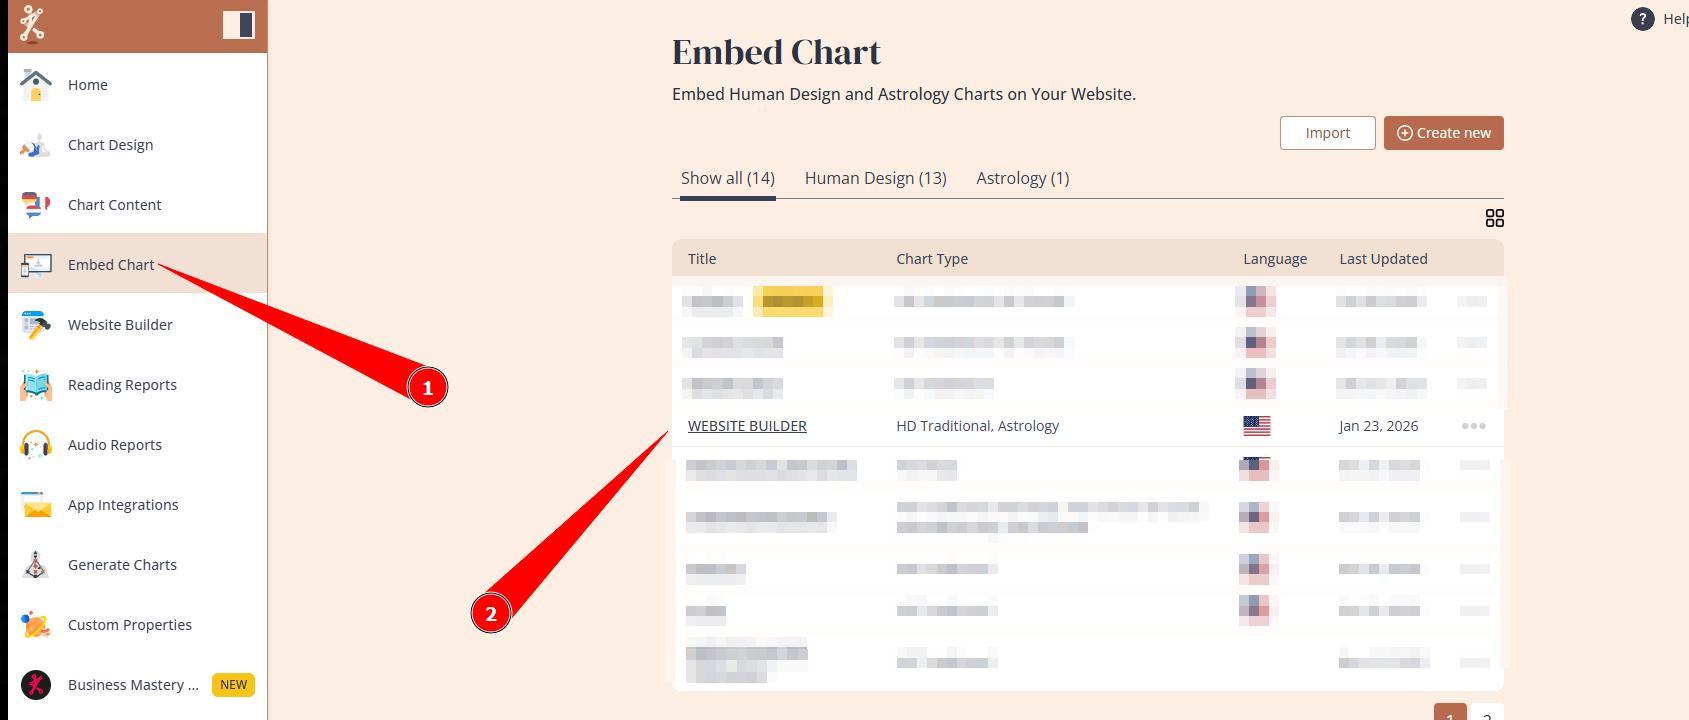
21. Give a connection name and paste Webhook URL that you copied from your email. Click Save
22. Now go to Embed Chart and open your embed code (if you have multiple embed codes, ensure you making edits on the embed code that is used at your website). Enable Zapier at App connections.

23. Ensure that your submission form has email field enabled at the Design tool, otherwise connection won’t work: How to enable email field.
24. Go to your website, generate chart and see if data came through to your google sheets.
You can also check video tutorial below:
Still have questions, is above guide outdated? Please message us on Live Chat or send an email to support@bodygraph.com.